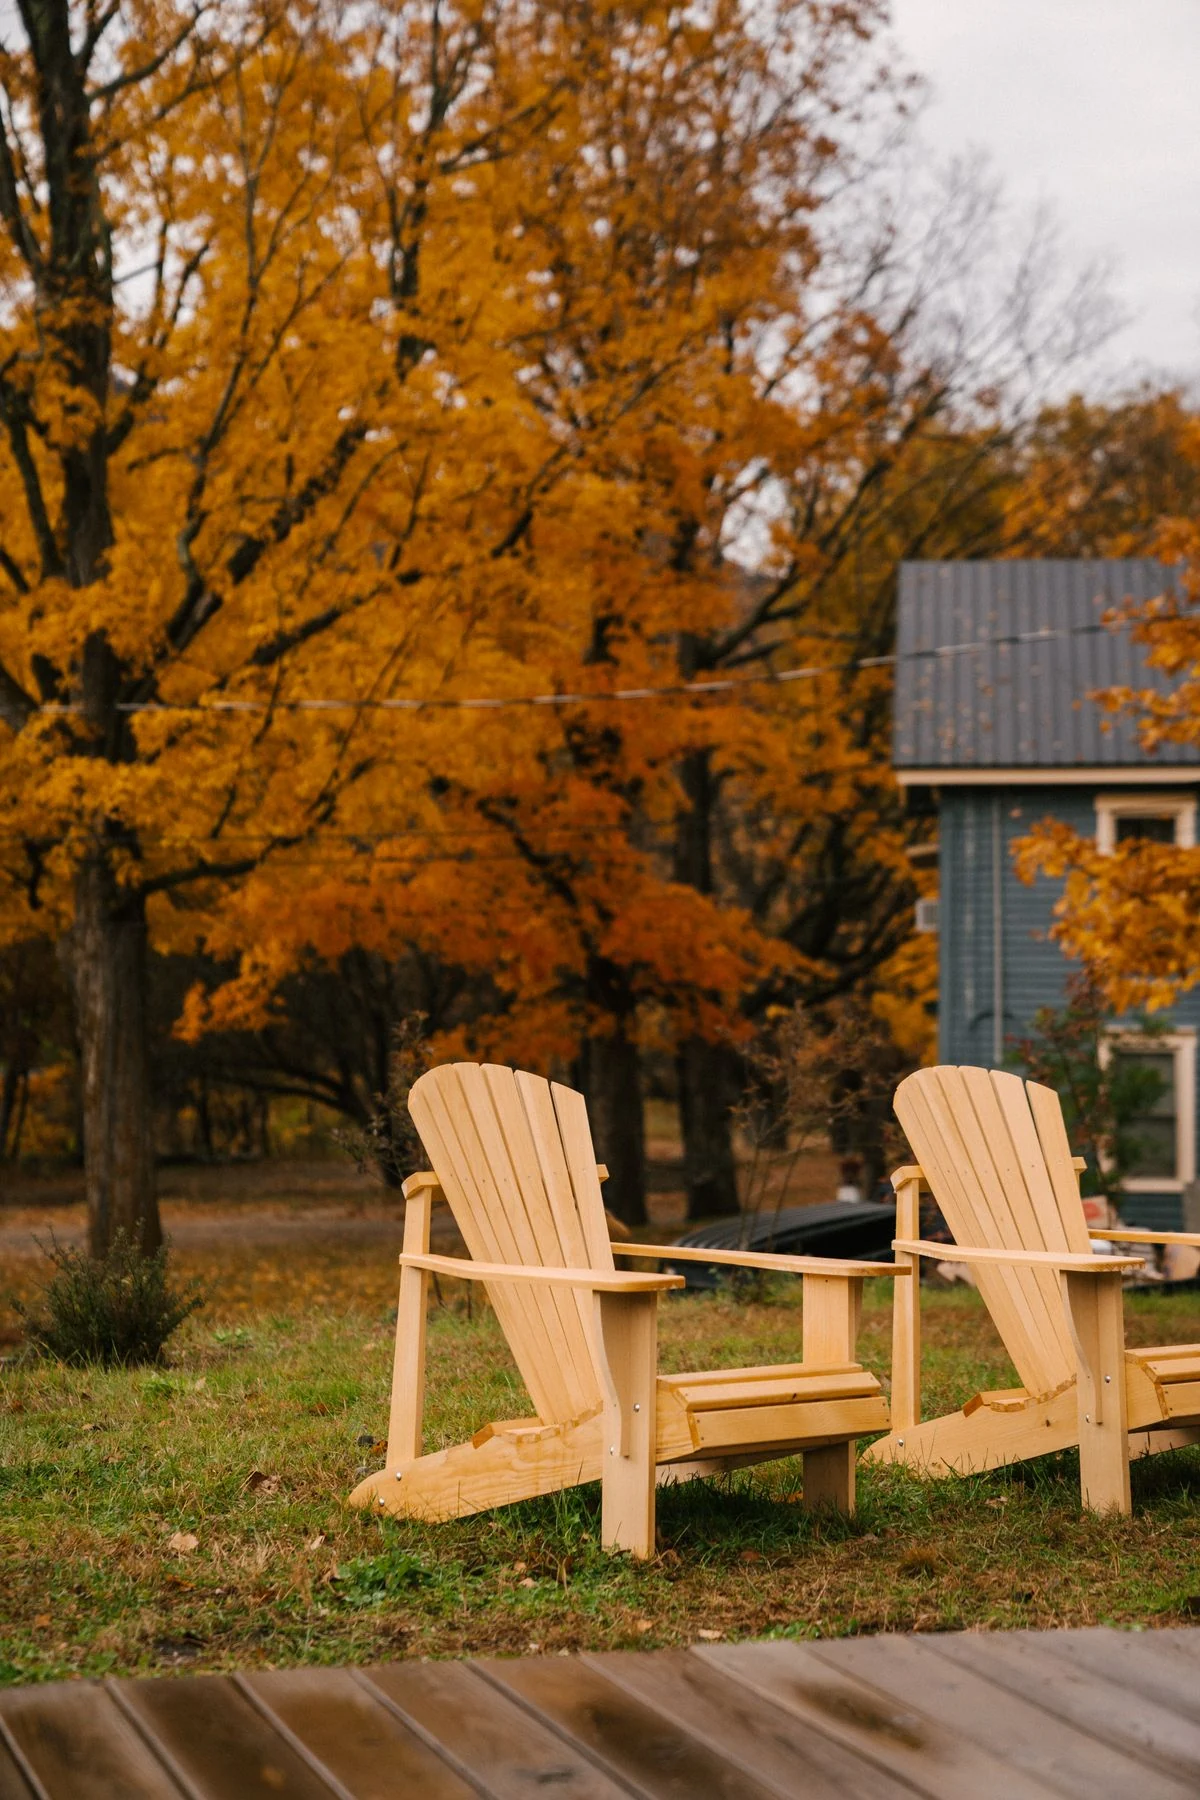
Two wooden Adirondack chairs on a lawn beneath golden autumn trees beside a cottage.
BACKYARDSMAGAZINE
Fall EditionOUTDOOR LIVING, CONSIDERED
GOLDEN DAYS. GOOD COMPANY.The season
to linger.
Thoughtful spaces.
A slower pace. More time outside.
GATHERThe autumn table, simply setILLUMINATEA garden that glows after darkGROWPlanting for the season ahead
THE SEASONAL JOURNAL OF OUTDOOR LIVINGBACKYARDSMAGAZINE.COM
Fall Edition / Web edition

The season to linger.

An autumn table, a garden bouquet, and the quiet beauty of flowers after their petals fall. Explore places to gather, the garden after dark, and a small promise of spring.

Gather · Illuminate · Grow

Browse the contents ↓
Inside the edition

A season to spend outside.

Credits ↓
From the editorial desk

A season worth staying for.

It is tempting to measure a garden by the things we have finished: a terrace laid, a fence painted, a border planted. This season, we are looking at what comes afterward. A lunch with time to talk. A few flowers carried indoors. A familiar shrub taking on a different shape as its color fades.

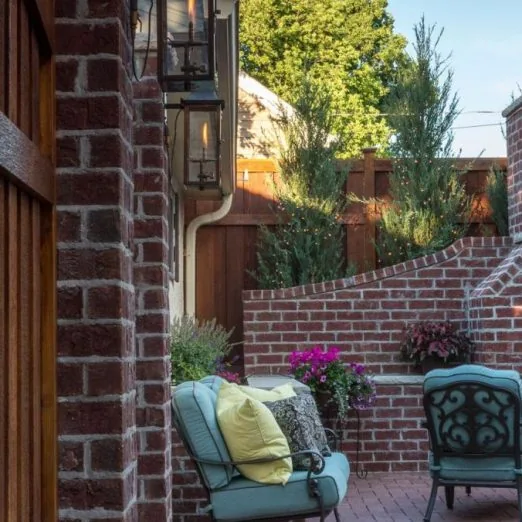
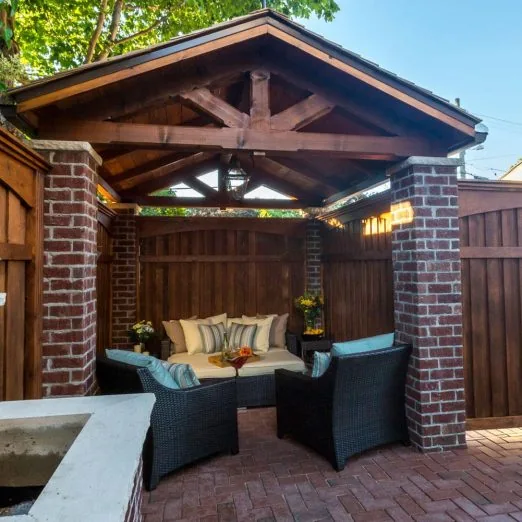
The places in these pages have their own answers. Southview Design’s New Orleans-inspired courtyard in St. Paul finds intimacy in brick, bluestone, and enclosed edges. SelectDecks’ covered patio in Morgantown gives a gathering its own shelter. Their details offer different ways to think about the relationship between a house and the life around it.

Follow the edition from the table into the evening garden, then toward next spring. Along the way, measure the space around a dining chair, consider the view from a porch, and lift the mulch to see what is already beneath it. These small acts of attention give the larger plans somewhere to begin. Leave the last flowers standing where they suit the plant and the place. Bring a few others to the table. Enjoy the garden you have made.

Clara Bennett

Backyards Magazine / Fall EditionGather
Gather

A little longer outside.

Set a table with room to move, look inside three sheltered outdoor rooms, and bring the last garden flowers indoors.

Gather / The Backyards Edit

Set an autumn table around the setting

A smaller gathering and a practical weather plan can make the season feel generous.
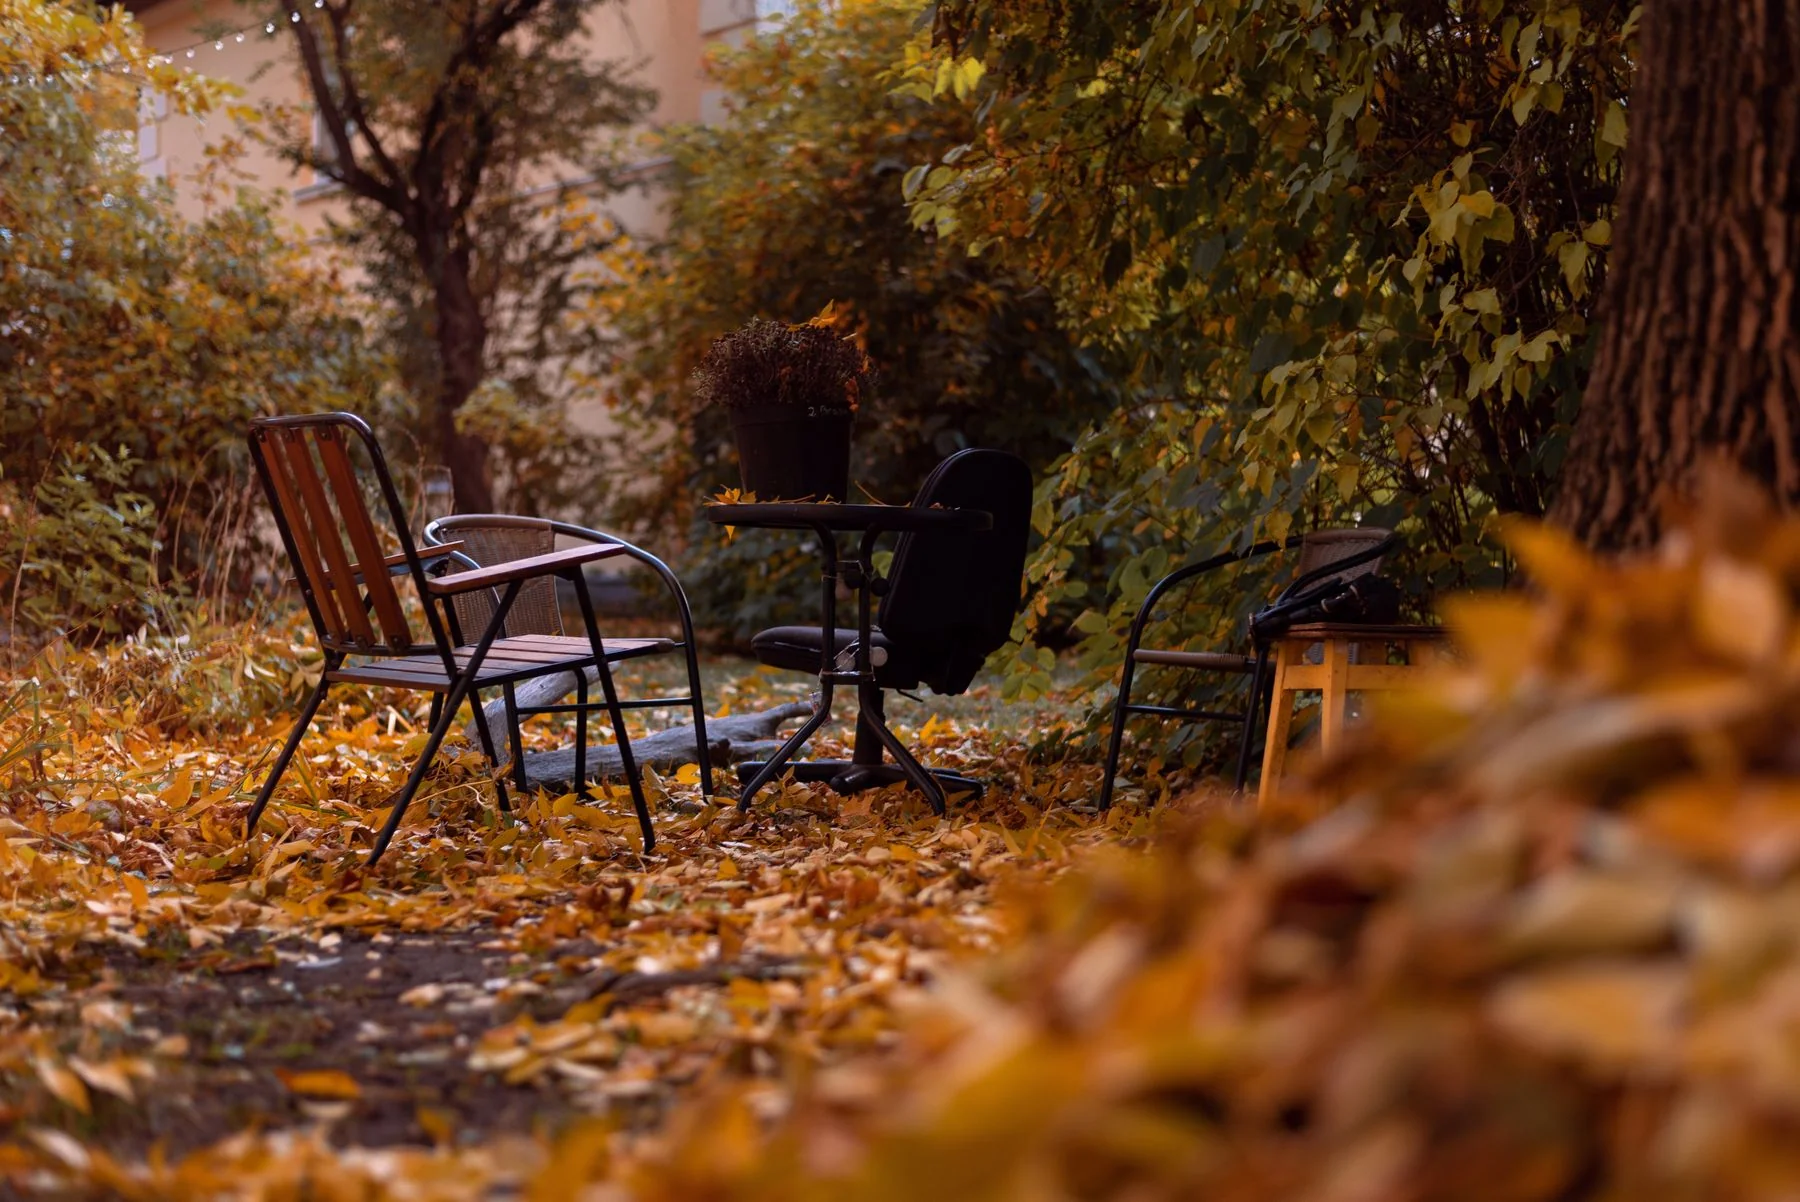
A small table and outdoor chairs in a garden surrounded by golden fallen leaves.

Dinner begins in daylight and ends after the garden has darkened. That change is part of the pleasure of a fall meal, and part of its planning. Keep the kitchen route short, the table easy to clear, and an indoor place ready if the evening becomes uncomfortable.

Build the table around the meal

Start with the dishes and serving pieces you need, then add a restrained seasonal detail if room remains. Leaves and planting beyond the table already supply much of the atmosphere. A tall or crowded centerpiece can interrupt conversation and compete with the practical surface.

Choose the location for the actual hour of the meal. A pleasant early-afternoon position may feel different as light fades. Keep the route to the kitchen and the indoor alternative straightforward.

Rehearse dinner at the hour you intend to eat

Set out the ordinary dishes as the light begins to change. Check whether faces, food, and the route indoors remain comfortably visible. A table chosen for a sunny afternoon photograph may be the wrong place for an evening meal.

Keep the setup light enough to move or clear if the weather changes. Put the indoor alternative into use before guests arrive: available chairs, a clear surface, and a place for the serving dishes. Autumn is experienced differently across the country, so base the arrangement on local conditions rather than expecting a particular temperature or foliage display to supply the occasion.

Make the fallback complete

DecisionSettle before guests arrive
Weather changeWhere everyone will sit indoors
Earlier darknessHow the route and meal setting are appropriately lit
ServingWhich dishes and drinks stay close to the kitchen
Put-awayWhere cushions and vulnerable table items go afterward

If heating or fire equipment is involved, use it only as specified by its manufacturer and applicable requirements. Do not improvise an enclosure to keep an outdoor plan going.

A change of room need not feel like the end of the gathering. Leave an indoor surface ready for the dishes and a place for everyone to sit. Then the outdoor meal can last as long as it feels comfortable, with a simple next step when it does not.
Gather / The Considered Detail

Give dinner a little more room

A dining space works when serving, sitting, and moving all fit into the plan.

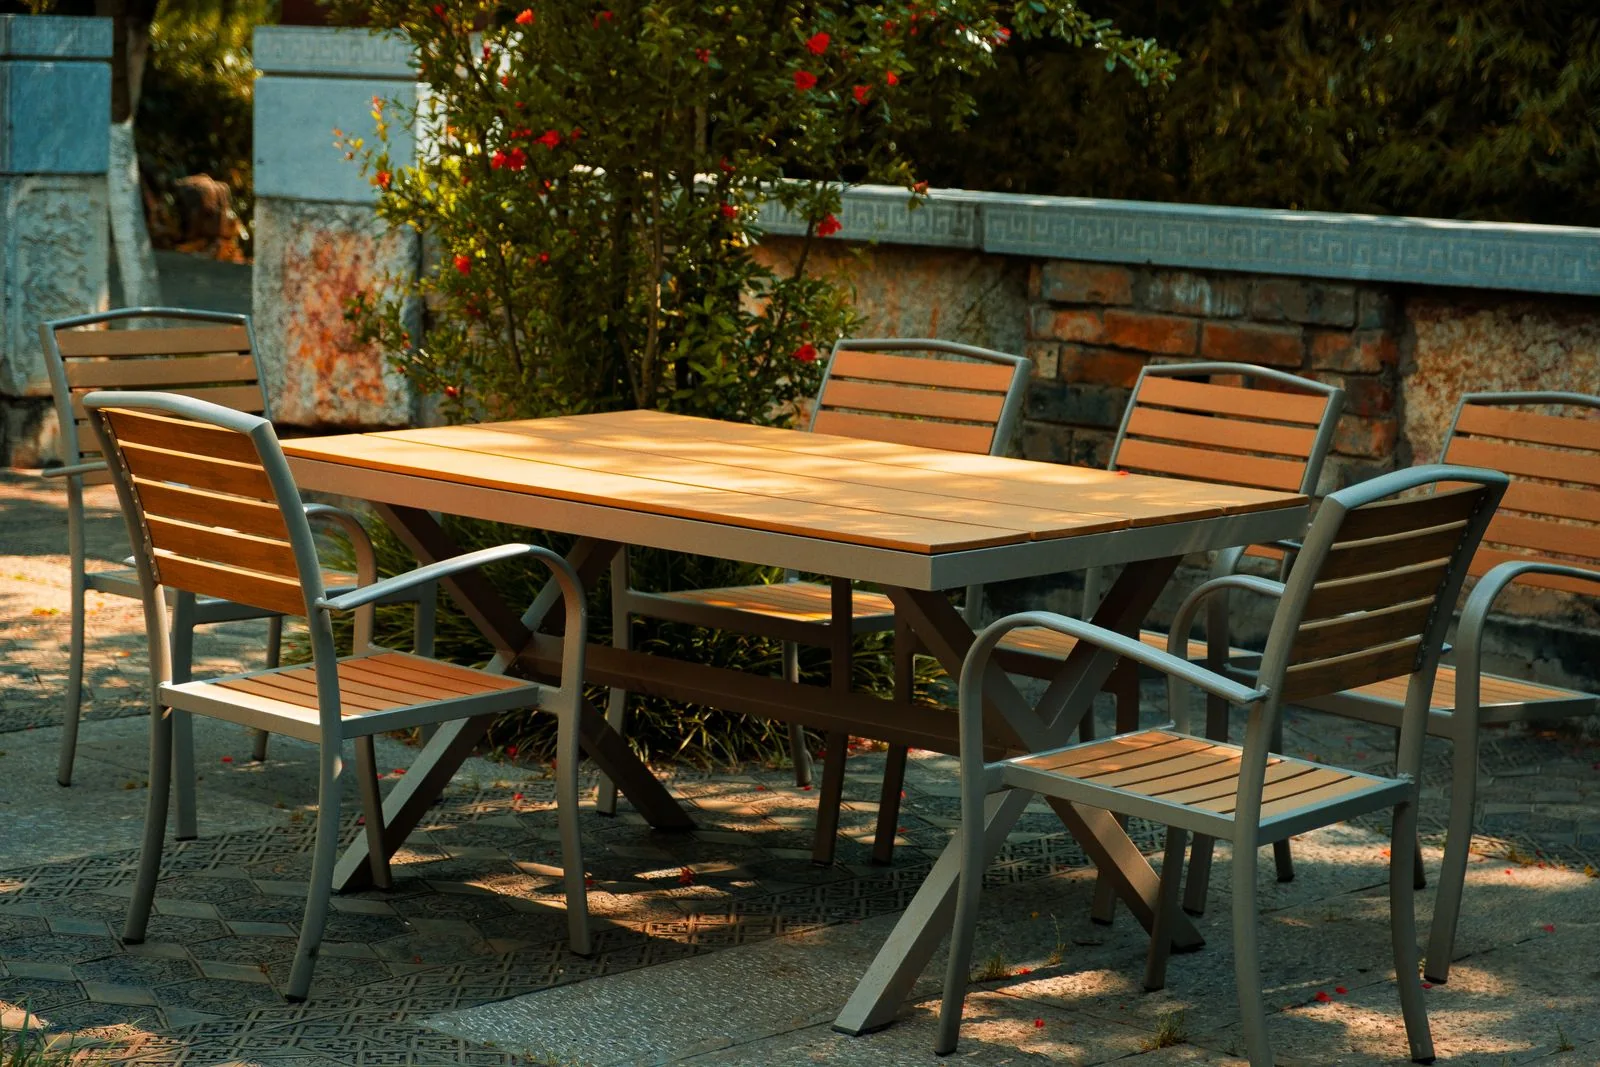
Wooden dining chairs around a rectangular table on a terrace bordered by stonework and planting.

The size of a table tells only part of the outdoor dining story. Chairs move, someone carries a tray, and another person gets up while dinner is underway. A good arrangement accommodates those ordinary moments without turning every meal into a furniture shuffle.

A table is only the first rectangle

Consider a hypothetical six-foot by three-foot table. Suppose the actual occupied chairs project two feet beyond each table edge. The table and seats then occupy ten feet by seven feet. If this household also chooses a three-foot passing strip behind the chairs along one long side, the combined envelope becomes ten feet by ten feet.

Those are illustrative inputs, not recommended clearances or an accessibility standard. Measure your furniture and test the room with its users. Door swings, posts, steps, the ability to stand, and any mobility needs may require a different arrangement. The calculation simply shows why a table that fits on a patio does not establish that dinner fits there.

Turn the measurement into a meal

Mark the table and occupied-chair outlines on existing safe ground. Ask one person to stand while another passes with an empty tray. Open the back door fully. Measure from the back of the occupied chair to the next obstruction, rather than measuring every clearance from the tabletop.

If the test fails, try rotating the table or choosing a less bulky chair before increasing the paved area. Keep a photograph and the dimensions of the successful arrangement for the designer.

Put serving where it interrupts least

A sideboard near the house can reduce repeated trips, but placing it in the doorway may create a queue. A drinks station farther from the cooking route can distribute guests more comfortably. The best location depends on which task happens most often and where people naturally stop.

MomentLook forPossible adjustment
Bringing food outA clear landing near the tableMove the serving surface into the meal route
Guests pouring drinksPeople blocking a door or chairGive drinks their own stopping place
Clearing dishesToo many separate tripsReserve part of a surface for returns
Gather / Project Feature

A little New Orleans in St. Paul

Brick, bluestone, lanterns, and water give a city courtyard its own atmosphere.

Southview Design ↗

St. Paul, Minnesota

Turquoise metal chairs gather around a low table in front of a brick outdoor fireplace

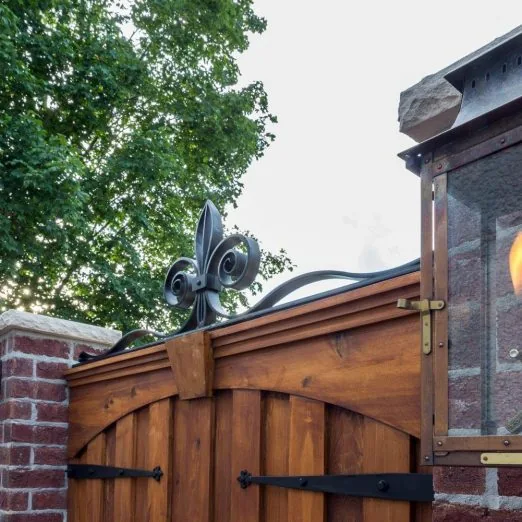
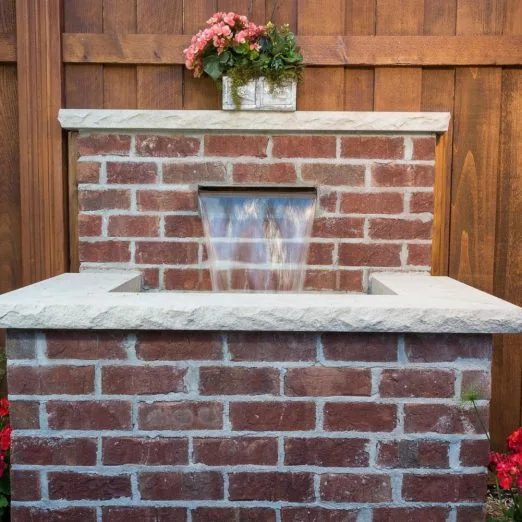
Southview's St. Paul courtyard takes its cue from New Orleans. The reference appears through an ensemble of brick, bluestone, wood fencing, gas lanterns, water, and a fireplace. The project is useful because the mood comes from the room's boundaries and surfaces, not simply from a collection of decorative objects.

A remembered place, translated

The New Orleans reference is especially useful as a study in intimacy. A courtyard has a threshold, a sense of enclosure, and something to look toward from a seat. Those qualities can be developed on a city lot without pretending the climate, architecture, or planting are identical to the place that inspired it.

Brick walls and patterned metal chairs frame a narrow corner of the courtyard.

The wall becomes part of the furniture

In a compact garden, boundaries stay close to the people using it. Brick masonry brings texture to the view from the seating; the wood fence supplies a different rhythm; planting mediates between the hard surfaces. Their relationship is experienced at eye level rather than from the aerial perspective of a plan.

The fireplace gives the room a strong destination. That focal point makes furniture orientation a consequential decision: chairs can gather around it, while the route through the courtyard needs to remain legible. Adding another large feature would change that balance. A small room benefits from deciding which element should command attention before purchasing the rest.

Sound and evening light belong in the composition

The source includes a water feature and gas lanterns. They suggest that the room was considered beyond a single daytime view. Water introduces movement and sound; the lanterns contribute a visible lighting character. Neither a photograph nor the material list tells us the exact sound level or nighttime brightness experienced on site.

For a courtyard of your own, test those qualities where the chairs will actually be. Listen with nearby doors open and closed. Consider the view of the lighting from the house and adjacent properties as well as from the table. Atmosphere is an experience to tune, not just an image to reproduce.

Gather / Project Feature

Keeping the slab, changing the whole experience

A retained concrete patio gains shelter, lighting, and a more legible arrangement.

SelectDecks ↗

Morgantown, West Virginia

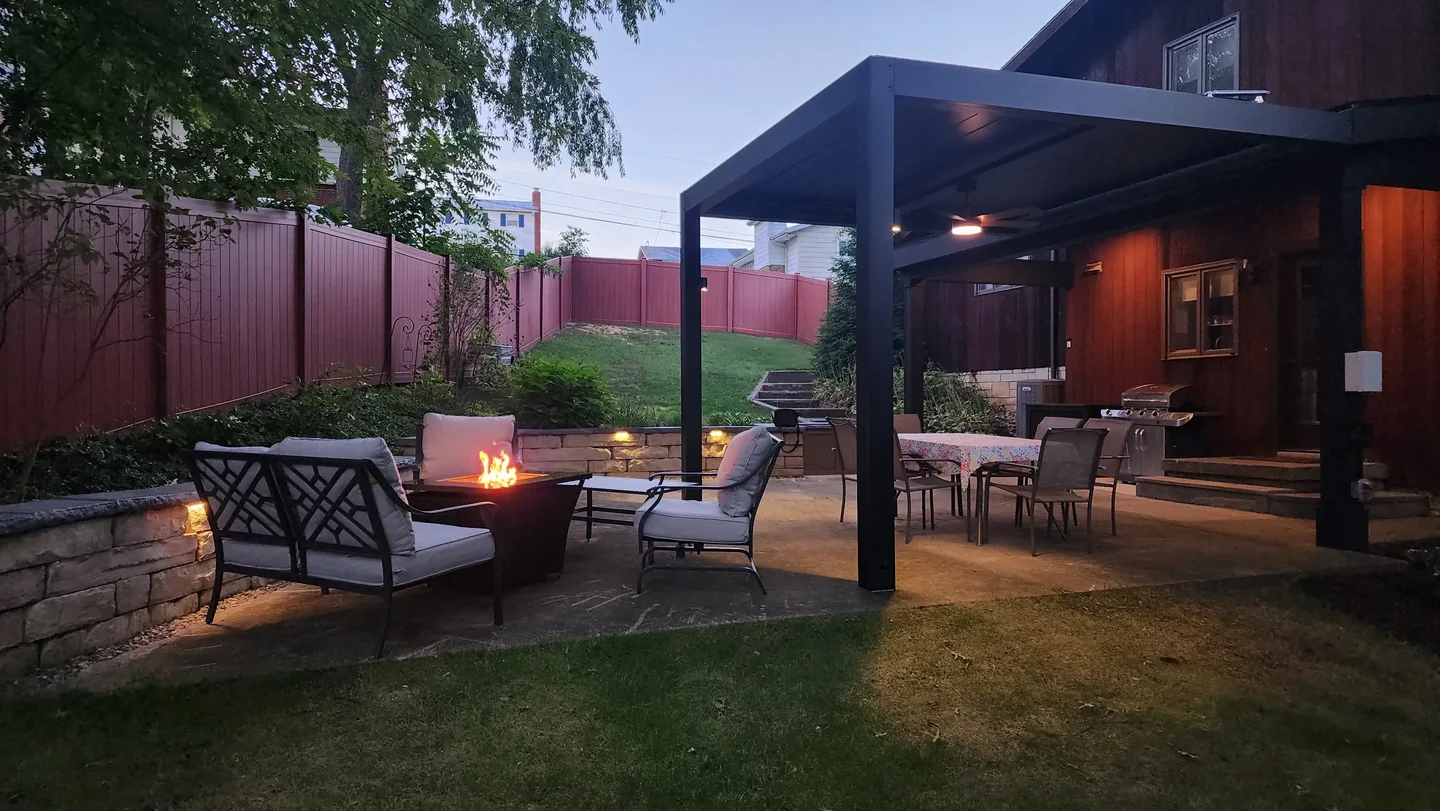
An open pergola and roofed patio frame a lounge area, with lighting set into the low stone boundary wall

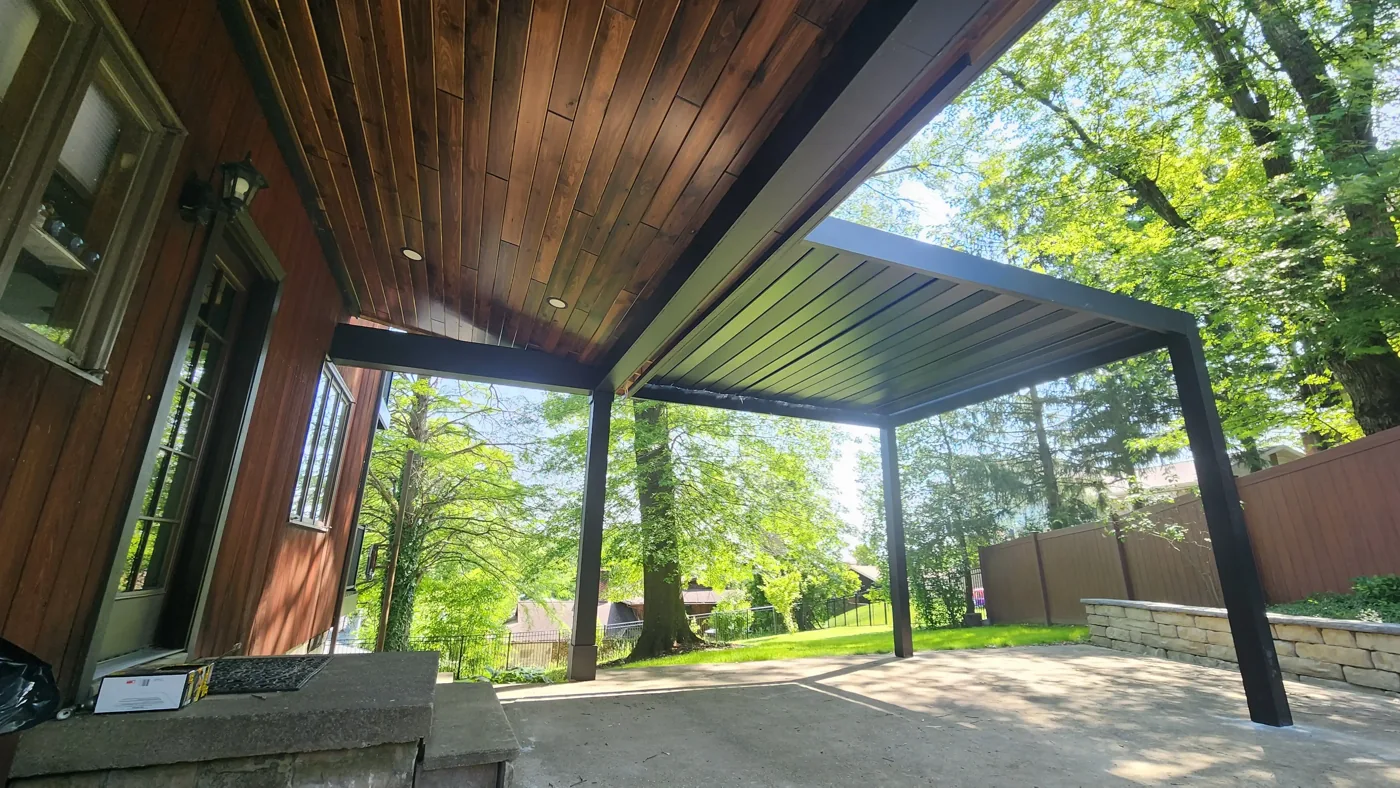
SelectDecks retained an existing concrete slab in this Morgantown renovation. Instead of beginning with a completely new floor, the project reorganized the space above and around it: a roof beside the house shelters the kitchen, while a motorized louvered pergola defines the main gathering area.

Keeping the slab changed the starting point

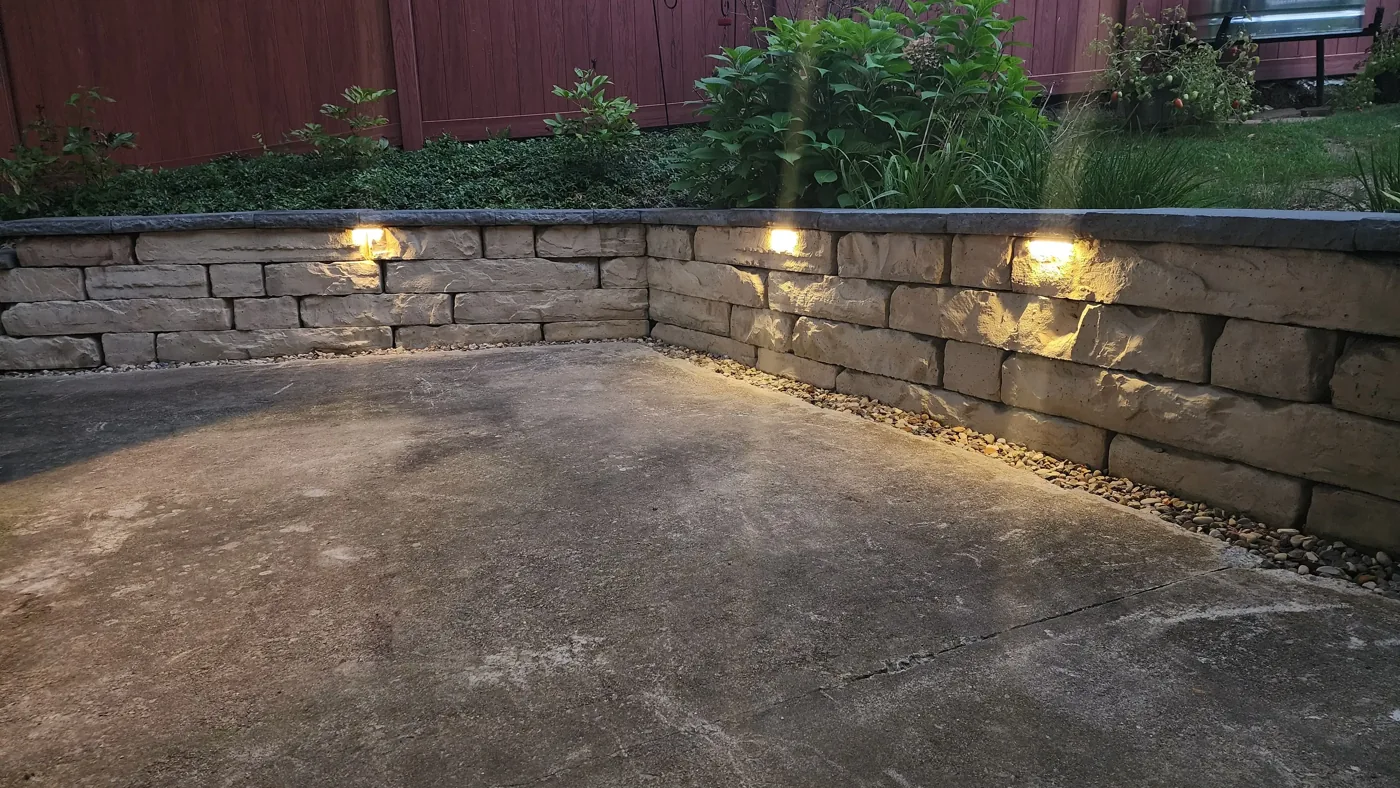
That is a useful renovation question in itself. The condition and suitability of an existing surface should be assessed before assuming replacement is the only way to transform the experience. Here, the room changed through shelter, boundaries, lighting, and a clearer division of uses.

Lighting beneath the wall cap illuminates the retained concrete patio.
The original concrete patio remains. New lighting is tucked beneath the wall cap.

The old wall was tied to the floor

The firm's account explains that the previous seating wall had been cast into the slab and needed to be separated carefully. This is the kind of detail that a finished photograph can conceal. Retaining one element may make the interface with another more demanding, rather than eliminating construction complexity.

The replacement Rosetta Kodah wall establishes a new edge. Its relationship to the pergola seating and the routes through the patio matters as much as its appearance in isolation. A boundary can define the gathering area effectively, but it also fixes the available furniture footprint.

Two shelters, one composition

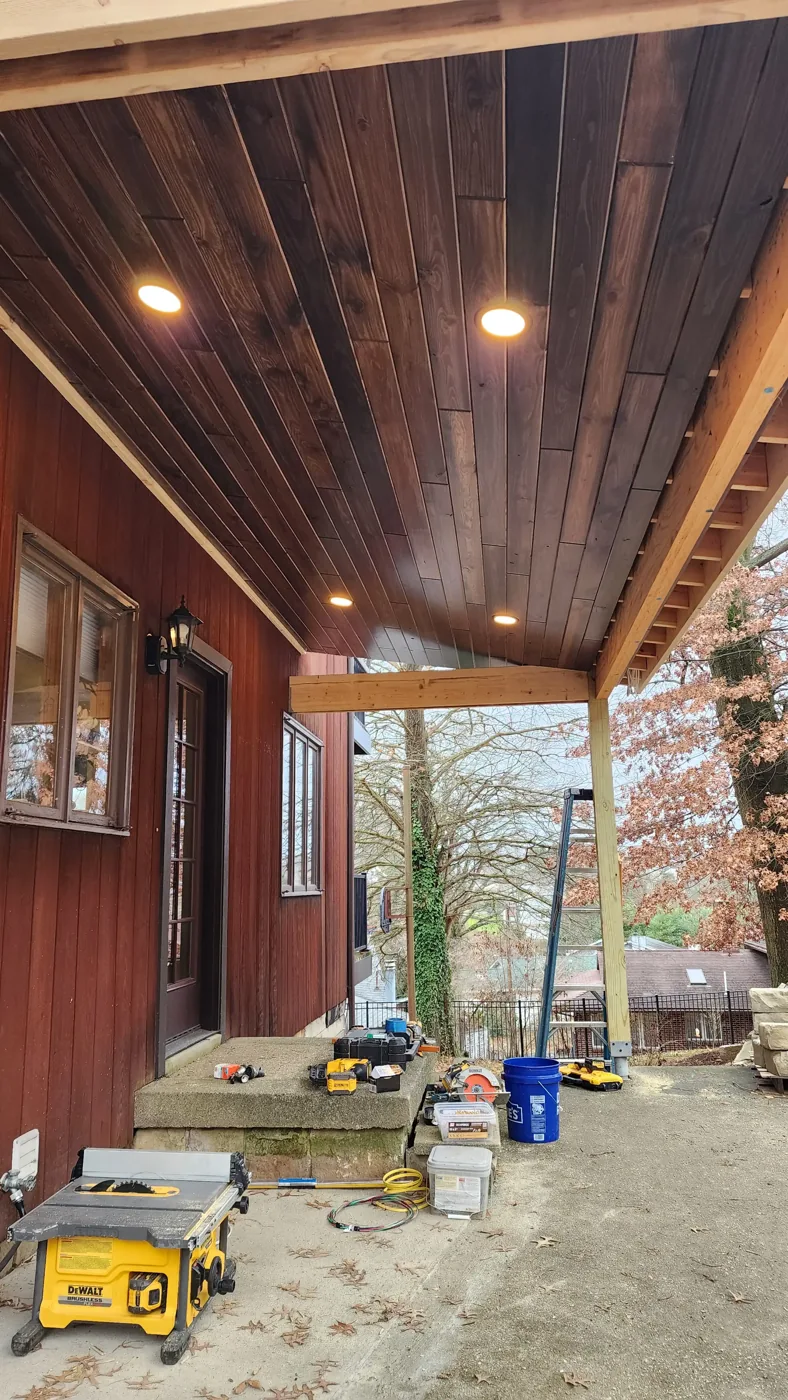
The house-attached roof and the Sundance louvered pergola provide different overhead conditions. Coordinated dark trim helps the structures relate to each other, while the published Synergy ceiling and leathered granite contribute closer material detail around the kitchen.

The adjustable pergola introduces operating choices that a fixed roof does not. A homeowner considering one should ask how the system is controlled, drained, serviced, and used under its specified conditions. Its flexibility should be evaluated as a complete installation, not just an appealing open-and-close effect.
Gather / Project Feature

An existing deck becomes an outdoor room

A fireplace and open pergola reshape an elevated deck, while a lower terrace gives the garden a second gathering place.

Mom's Design Build ↗

Edina, Minnesota

The completed deck and lower terrace remain connected to the house, with open lawn in front.

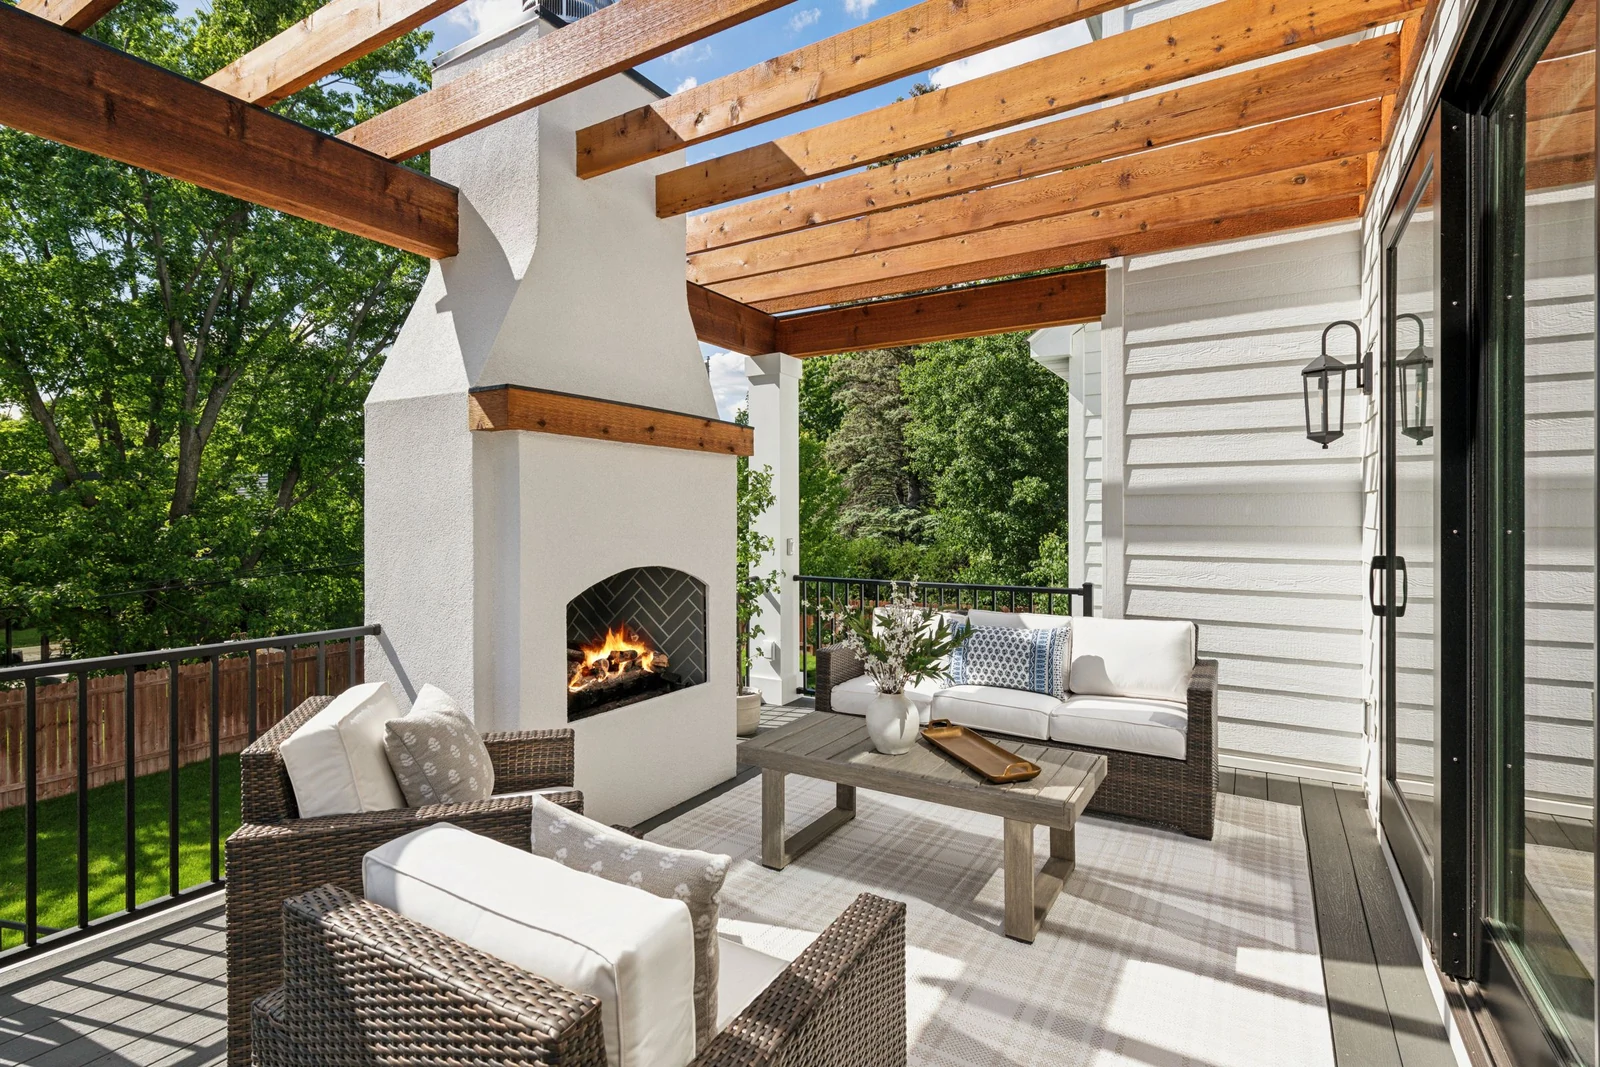
The house still meets the yard by way of an elevated deck, but the experience of that threshold has changed. At Hearth Hideaway in Edina, Minnesota, Mom's Design Build adds a pergola and fireplace above a lower garden terrace. The deck becomes a furnished room, while the ground below gains a separate place to gather.

Begin with what is already there

The firm's account credits designer Becca Bastyr and describes a renovation of an existing builder-grade deck. New trim, fascia, and wrapped columns help connect it to the house. The before photograph makes that continuity visible: the broad arrangement of house, deck, stair, and lawn remains recognizable.

That is an instructive starting point for a renovation. Ask which relationships already work before deciding which finishes to replace. The position of a door or stair may be useful even when the surrounding space feels unfinished. Record what is worth keeping, then show how each proposed addition improves the whole.

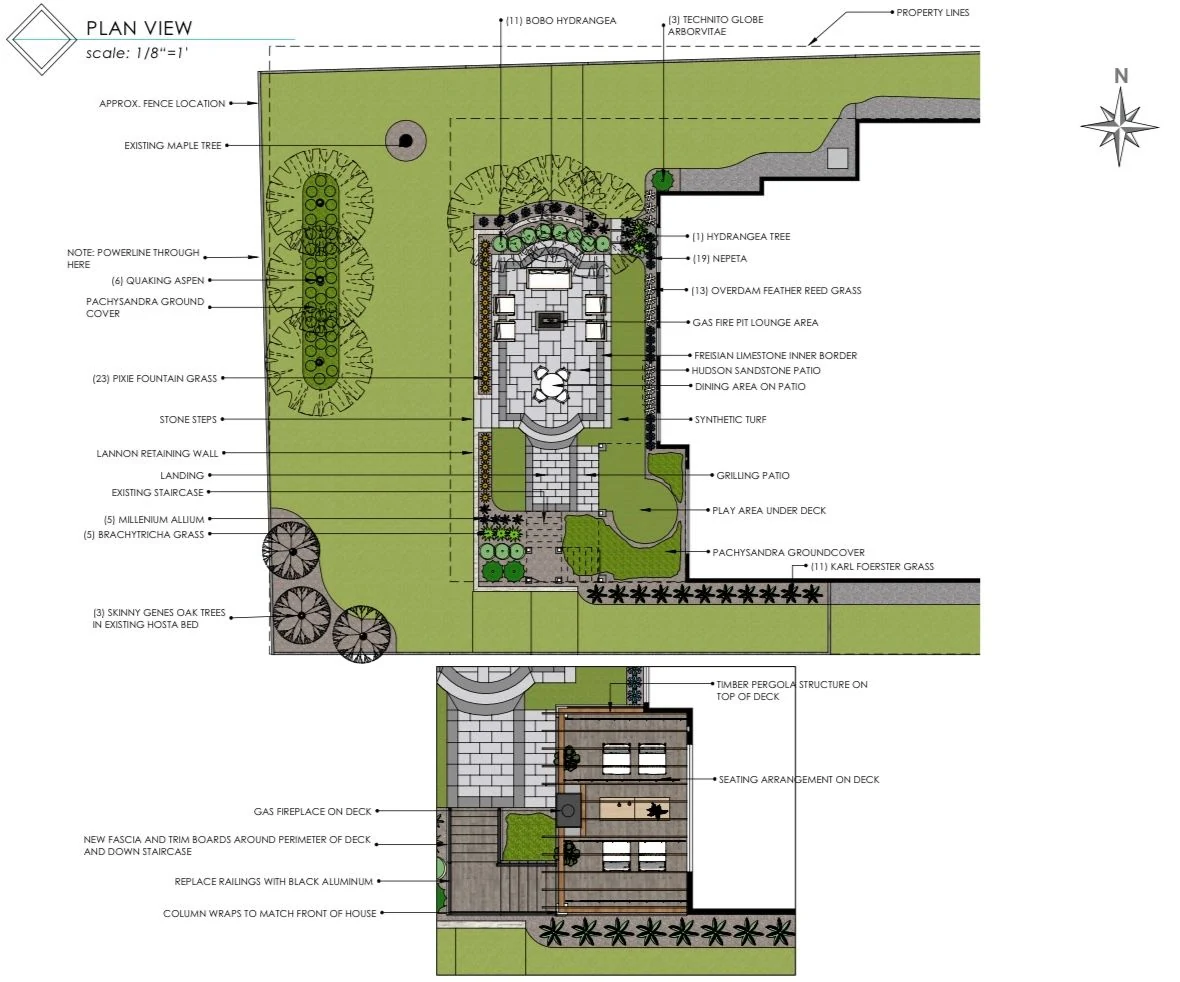
The published plan is helpful here because it depicts both the deck and the lower landscape. Treat it as project design documentation, not a measurement template for another property.

A fireplace gives the deck a face

In the close views, the fireplace supplies a solid background to the seating, while the pergola establishes an overhead rhythm. Dark railings remain visually lighter at the open sides. The room has both enclosure and an outward view rather than an equally strong boundary on every edge.

The furniture reinforces that arrangement. Seats turn toward the fireplace and one another; the coffee table occupies the middle of the group. Before asking for a similar built feature, place the intended furniture on a plan and identify the view from each seat. An attractive focal point is most useful when the everyday layout actually addresses it.

The photographs also make the distinction between a pergola and a solid roof clear. Open structure creates a strong visual ceiling, but a homeowner seeking rain protection needs to make that separate requirement explicit.

The fireplace gives the deck seating a solid backdrop beneath the open pergola.

Give the ground its own purpose

The lower patio accommodates dining and a separate gas-fire gathering area, with a retaining wall addressing the slope. In the wider photograph, the pale terrace sits close to the house while the lawn remains open beyond it.

A two-level arrangement can easily produce leftover space beneath or beside a deck. Here, the wider view encourages a more useful question: what should the lower destination do that the upper room does not? The answer might be dining, a larger group, or a closer relationship with planting. It should be clear enough to justify the trip down the stairs.

Review the renovation from three distances

Seen from the lawn, the pergola and fireplace give the upper deck a more substantial outline. The lower terrace answers it with another place to sit. Renovating the elevated room has also changed the ground-level view of the house.

Gather / Life Outside

A few flowers from the garden

Choose a vessel, gather with care, and let the stems keep something of their garden character.

A dark vase of pink and peach flowers stands on a wooden garden table with planting behind it.

A handful of garden flowers can bring the season to the table without reproducing a florist's arrangement. A bent stem, an uneven opening, or a leaf with an interesting edge can give the vase something of the place it came from. The useful restraint is deciding what to leave in the garden.

Walk the bed before taking the scissors. Look for a few stems that can be removed without emptying the best part of the border. Choose from plants you can identify and are allowed to cut. A purchased bunch from a local grower is an equally good beginning when the garden has little to spare.

Begin with the vessel

Choose the vase before cutting so the stems have a destination. Its opening determines how much material is needed and how easily the stems will support one another. A narrow-necked vessel can make a few stems feel complete. A wide bowl asks for a different approach and usually more support.

For a dining table, set the empty vase between two occupied seats and check the sightline. An arrangement can be short enough in the center yet still place a sideways stem directly in someone's face. Leave room for water glasses and serving dishes. On a side table, a taller or more spreading shape may have space to develop.

Do not put an unknown plant into food, onto a cake, or where a child or pet may chew it. Decorative use does not establish that a plant is edible or safe for a particular household. Keep the arrangement and food service distinct unless the plants and their intended use have been properly identified.

Take care before arranging

University of Minnesota Extension's cut-flower guidance recommends cutting early with sharp tools, placing stems in water promptly, and letting them hydrate before arranging. It also recommends clean containers and removing leaves below the waterline. Those small preparations are worth doing before thinking about the shape of the bouquet.

Wash and rinse the vase, and use fresh water. If using a commercial floral preservative, follow its directions rather than improvising a household mixture. Keep the working container nearby while you cut; a decorative basket can carry the scissors without being the place where thirsty stems wait.

Choose stems for their condition as well as color. The suitable harvest stage varies by flower, so check guidance for the plants you grow. A bouquet assembled from the garden is a good reason to learn the names of a few favorites more precisely.

Let the stems suggest the shape

Begin with the stems that establish the outline. Turn the vessel and look from the side as well as above. Add the more prominent flowers where they can be seen, leaving enough space around them for their individual forms to read.

Repeating a color can connect very different shapes. A pale flower and a similarly colored leaf edge may be enough; every stem does not need to match. If the arrangement feels heavy, remove something before adding another filler. The spaces between stems can be part of its character.

Here is a small exercise: make one arrangement, photograph it, and remove roughly a third of the stems. Study the difference. The fuller version may be right for a sideboard, while the edited one may suit a table for two. Return spare stems to water in a second vessel rather than forcing every cut flower into the same bouquet.

Let the arrangement change

Check the water and the stems regularly, remove material as it fades, and keep the vessel clean. Move the flowers out of harsh sun and away from a heating outlet. Expect different stems to last for different lengths of time; a bouquet can become smaller and still be worth keeping.

Notice which flowers you enjoyed cutting and which left a gap you missed outside. Next season, give the regular vase fillers a small patch of their own, or buy those stems from a grower. The garden need not lose its best view to furnish the table.

Backyards Magazine / Fall EditionIlluminate
Illuminate

When the light changes.

Light for the evening, a porch worth lingering on, and the furniture care that carries a room into the cooler months.

Illuminate / The Considered Detail

Design for the evening you want

Begin with the places and moments that need light, then choose the fixtures.

Glowing string lights beneath a timber canopy with trailing green leaves.

Dinner is over, but the garden lights are still set for cooking. The counter is bright; the seat beyond it feels exposed. Planning separate scenes for arrival, meals, and conversation gives a lighting designer something more useful to work with than a list of fixtures.

Write three scenes instead of a fixture list

Describe arriving home, cooking dinner, and sitting quietly after the meal as separate scenes. Each needs a different combination of light. The arrival route should remain understandable, while a task at the counter and a relaxed conversation do not need identical illumination.

DarkSky International and the Illuminating Engineering Society recommend lighting with a clear purpose, directing it where needed, limiting brightness, using controls, and favoring warmer light where possible. Apply those principles to the actual views from your seats and windows, rather than using brightness as a substitute for a considered plan.

SceneReview with the lighting designer
ArrivalCan the route and changes in level be understood without distracting glare?
CookingDoes the person working cast a shadow on the useful surface?
ConversationCan unnecessary lights be dimmed or switched off independently?

Review where the beam ends

During an evening demonstration, follow the light beyond its intended subject. A wall, canopy, or path may be illuminated well while unwanted light reaches a bedroom window or leaves the property. Ask for the aim, shielding, and output to be adjusted before adding more fixtures.

View the result from the lowest regular seat and from inside the house with normal indoor lights on. The fixture itself may be more conspicuous from a low chair than from a standing position beside the path. Ask the designer to address that view as well as the illuminated surface. Darkness can remain part of the garden's composition.

Observe the garden after dark

Look from the house and from the main outdoor seat. Note existing light from windows, neighboring properties, and the street. Record the areas that feel difficult to navigate separately from the places where you simply want atmosphere.

Ask for an evening adjustment visit

Aiming and controls may need refinement once the furniture and planting are in place. Discuss that review as part of the scope. Walk the garden, look back from indoors, and check the effect from the boundary. Keep a simple note of the settings that work so the system remains easy to use.

Illuminate / Material Matters / Product note

WAC Grand Accent: a tree, a beam, an evening view

An adjustable accent light is a reminder to review the effect from the seat and the boundary.

WAC Lighting ↗

WAC accent lighting illuminating a mature tree and garden at night

WAC's Grand Accent 5211 is a low-voltage accent fixture with adjustable beam and brightness controls. That flexibility can help a lighting designer refine a particular feature. It does not mean one fixture should perform every lighting job in the garden, or that a brighter view is automatically a better one.

Separate accent light from useful movement light

A highlighted tree does not necessarily make a step or route adequately visible. Have those tasks addressed separately in the lighting plan. DarkSky and the Illuminating Engineering Society recommend lighting that has a purpose, is targeted, uses no more light than necessary, is controlled, and favors warmer color where possible.

Use that guidance to question unnecessary spill and operating hours. Ask whether the effect can be achieved with a more carefully aimed or lower output setting before increasing brightness. Color temperature is also a specified choice, not a detail to leave unrecorded.

Specify the whole low-voltage system

WAC's documentation identifies the electrical requirements for the 5211, including its supply range. Have the installer select the compatible transformer, wiring, controls, and connections as a complete system. The luminaire alone is not the installation.

Record the model, finish, color temperature, settings, and control schedule at handoff. Ask how aiming can be adjusted as planting grows and who will handle that work. A later review should begin with the existing settings: try refining the beam before adding another fixture. The aim is to keep the intended subject clear without steadily increasing the amount of light in the garden.

The fixture’s hood and adjustable head are visible in the product view. Final aiming happens in the garden after dark.

Aim from the seat, then walk away

During a nighttime demonstration, begin in the principal chair or indoor viewing position while the installer adjusts the fixture. Notice whether the source itself is visible and whether the intended trunk or texture reads clearly. Then walk the route to the house and look from adjacent windows. An attractive effect from one viewpoint can become glare from another.

Ask to compare lower output and a tighter or better-positioned beam before adding another light. The adjustable fixture is useful when it allows that refinement. Record the final settings and position so later maintenance has a reference, rather than rebuilding the effect by turning everything brighter.

Expect the garden to change

A tree's foliage, a growing shrub, and accumulated leaves can alter the light over a season. Arrange a review after the planting has developed, and keep access to the fixture clear enough for cleaning and adjustment. Moving a plant or pruning it for horticultural reasons may also change what the beam reaches.

Set the operating hours around the evenings you spend outside. The installer should show you how to shorten the schedule and adjust the scene. Keep a note of the chosen settings, then revisit them as the planting grows; more foliage need not automatically mean more light.

Illuminate / Life Outside

The porch between house and garden

Give the doorway, the view, and the everyday visit a place in the room.

Woven chairs surround a table on a porch with a timber ceiling and broad views of leafy trees.

A porch belongs to two places at once. Its roof and floor are part of the house, while its light, sounds, and view belong to the garden. Furnishing it well means allowing both relationships to remain visible.

The temptation is to treat the floor as an empty room waiting for a complete furniture set. A more revealing beginning is to notice what already happens there: arriving with shopping, waiting for someone, taking off muddy shoes, or sitting for a few minutes before going indoors. A porch can become a favorite room by making those ordinary pauses more comfortable.

Keep the doorway in the picture

Open the door fully and follow the route from the house to the steps or garden. Include the space needed to carry a bag or tray, and consider the people who use the route. This passage is part of the room. It should still work when someone is sitting down.

On a narrow porch, two chairs along the house may leave a clearer route than a sofa facing outward. On a deeper one, a small grouping at the end can make a destination without occupying the entrance. Neither arrangement can be chosen from the floor area alone: doors, posts, railings, and the direction of the view change the answer.

Try the arrangement with furniture you can move. Sit in every position, then ask someone to pass through. Notice whether a person entering the house has to interrupt a conversation or squeeze between a chair and a table. That is a layout problem worth solving before choosing upholstery.

Furnish the ordinary visit

Give each seat somewhere to put a glass or book. A modest side table can do more for daily use than a large central table that is difficult to reach. If the porch is used for reading, test the chair with the book you would actually bring out; a seat that feels good for a conversation may offer the wrong support for an hour of reading.

Then consider what must be carried outside every time. If enjoying the porch requires retrieving cushions from upstairs, moving a planter, and finding a lamp, the room asks for a small production before every visit. Decide which objects can safely remain in their intended exposure and which need nearby storage.

A roof does not make an open porch an indoor room. Check furniture, textiles, and electrical products for their actual intended use. Wind-driven rain, dampness, and sun can reach sheltered surfaces. Follow the maker's care and installation requirements rather than assuming that a covered position resolves them.

Give the room a view, and a little privacy

The most attractive direction is not always straight ahead. A chair angled toward a tree may also turn the sitter away from a neighbor's window. A planter can soften a post without creating a continuous barrier. Look from seated eye level before adding screening.

Keep the view from indoors in mind too. The backs of the porch chairs may become the foreground of the kitchen or living-room window. An open frame, a lower back, or a different position can make the garden easier to see. Check those possibilities with the actual furniture; product photographs seldom show the relationship from both sides of the glass.

For a useful documented example, Mom's Design Build's Urban Oasis project in St. Paul began with a homeowner's memory of a childhood porch. The firm's account describes a fireplace positioned to improve the view from the kitchen. That specific decision is a reminder that the porch can serve the household even when nobody is sitting in it.

Know when to stop furnishing

Leave some floor and some view unclaimed. An empty patch can accommodate a visiting chair, an open door, or a person stopping to talk. It also lets the architecture remain legible: the line of the railing, the ceiling, and the rhythm of the posts.

Spend an ordinary week with the simplest workable arrangement. Keep the chair that gets used, the table that is within reach, and the route that remains clear. Add the next object only when you can name what is missing. The porch earns its place through those repeated, easy visits.

Illuminate / The Garden Notebook

The garden you see through the window

Design an outlook that matters even when you stay indoors.

Frost-covered branches and a bare tree over a winter garden path.

The kitchen window may be your most-used garden seat in winter. From there, an empty planter, the back of a stored chair, and the shape of a bare tree become part of the same view. Designing that small scene can reward you even on days spent entirely indoors.

Frame the view as a small composition

Use the window itself as the boundary of the design exercise. In an illustrative kitchen view, a path may lead toward an evergreen mass while a simple seat provides a foreground detail. The wider garden can remain varied; this particular frame needs only a few readable elements.

Look at the same view from the place you actually sit or stand. Moving to the center of the window for a photograph can create a composition you rarely experience in daily life.

Compare the lit and unlit window

Look through the window after dark with the room's ordinary lights on. Reflections may become more prominent than the garden. Photograph what you actually see from the sofa or sink; a daytime garden photograph cannot describe that experience.

Discuss a restrained evening view with the lighting designer if it matters to the household. The aim might be one readable tree or planted edge beyond the glass, rather than lighting every part of the yard. Test the result with interior lighting in its usual state, and retain a useful daytime composition when the outdoor lights are off.

Give stored objects a winter plan

Furniture covers, empty containers, and stacked chairs can become the most prominent shapes once flowers and leaves are absent. Record where they will go before deciding the winter garden needs more ornament. A tidy storage location may improve the outlook more directly.

View componentUseful question
PlantingWhat structure remains in the local winter conditions?
Paving and pathsDoes the route lead the eye somewhere deliberate?
FurnitureIs its stored arrangement part of the intended view?
LightingIs the evening effect comfortable from inside?
Illuminate / Material Matters / Product note

Barlow Tyrie teak, new and weathered

The material palette should include the care routine and the appearance you want over time.

Barlow Tyrie ↗

Barlow Tyrie Adirondack teak furniture in a garden setting

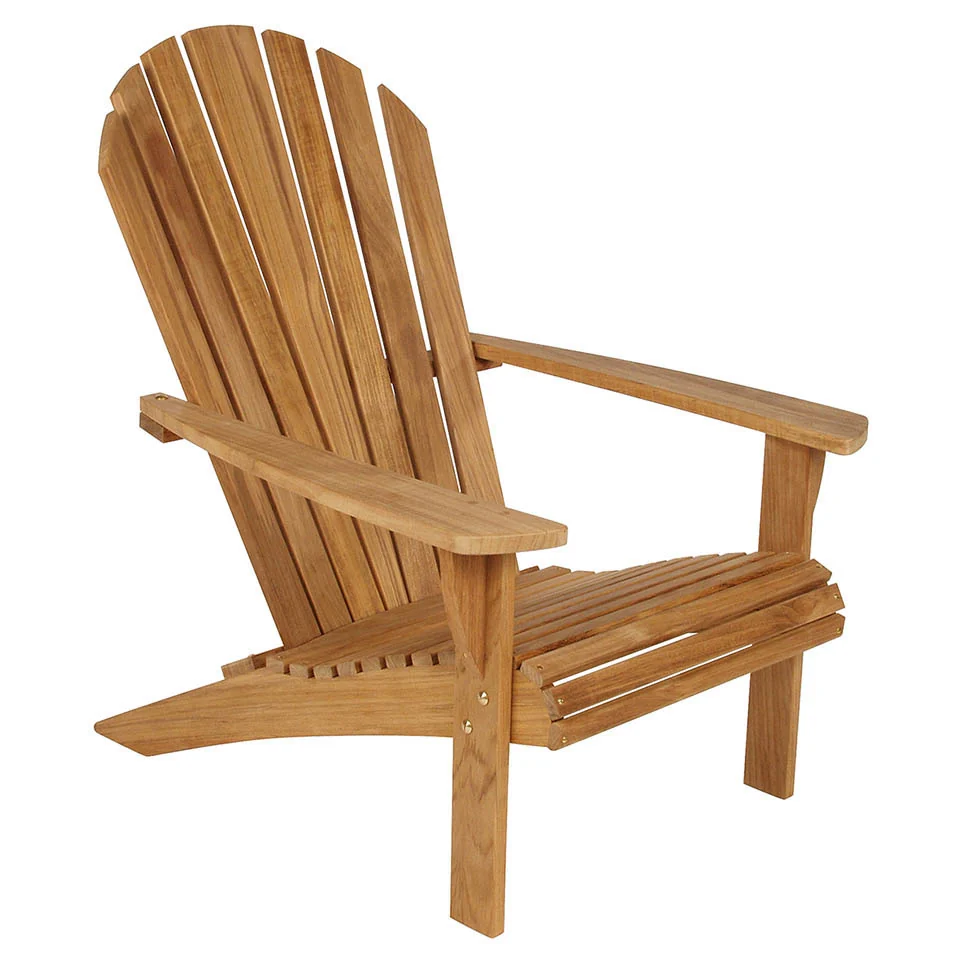
Teak furniture presents an appearance choice as well as a maintenance choice. Barlow Tyrie's care guidance distinguishes allowing teak to weather toward a silver-gray tone from using an appropriate care program to retain a warmer appearance. Decide which result you want before buying a treatment.

Choose the appearance you can live with

Look at examples of both new and weathered teak beside the proposed setting. The changing timber can sit comfortably in a planted garden, but it may be less appealing if the room depends on a uniform warm-brown palette. Neither preference is wrong; the care routine should follow it explicitly.

Consider the whole furniture group. Pieces in different exposures may not change identically. If that variation would be frustrating, discuss the expected result and maintenance with the supplier before assuming a single product will keep everything visually uniform.

Read the instructions for the whole piece

Identify the exact furniture model and every material that needs care, including fittings, slings, cushions, or other finishes. Follow the current manufacturer guidance and the chosen product's directions. Do not transfer a generic oiling or cleaning recipe to furniture whose maker recommends a different approach.

Ask what preparation is required, how often the condition should be assessed, and what the practical cleaning process involves. Keep the approved care products and instructions together so the routine remains consistent when someone else helps with it.

An unweathered teak chair shows the slatted surfaces and joints that remain part of routine cleaning.

Compare exposed and sheltered pieces

A table under a roof and chairs left in the open may develop different appearances. Before treating that as a defect, decide whether the garden can accommodate the variation. A relaxed planted setting often can; a tightly coordinated terrace may make it more noticeable. Set expectations for the whole arrangement rather than judging each piece against the color it had when unpacked.

If moving furniture seasonally, consider the practical route and where the complete group will stand. A protective cover needs to be suitable for the furniture and used according to the maker's instructions. Covering is not a substitute for cleaning or a reason to store a damp arrangement without regard to ventilation and the recommended routine.

Buy care products after identifying the goal

Separate cleaning from changing or maintaining color. Ask the supplier to identify which product addresses the actual condition and which sequence is appropriate for the furniture. Avoid adding treatments simply because the surface has begun to look different from new teak; that change may be the appearance you chose.

Keep the furniture model and the names of any care products you use in one place, especially if someone helps with maintenance. That small record prevents a cleaner, an oil, and a color treatment from becoming interchangeable guesses. If you chose weathered gray teak, let the changing color be part of the garden.

Illuminate / The Considered Detail

Plan the cushion routine before buying the sofa

Comfort includes what happens when the weather changes or the evening ends.

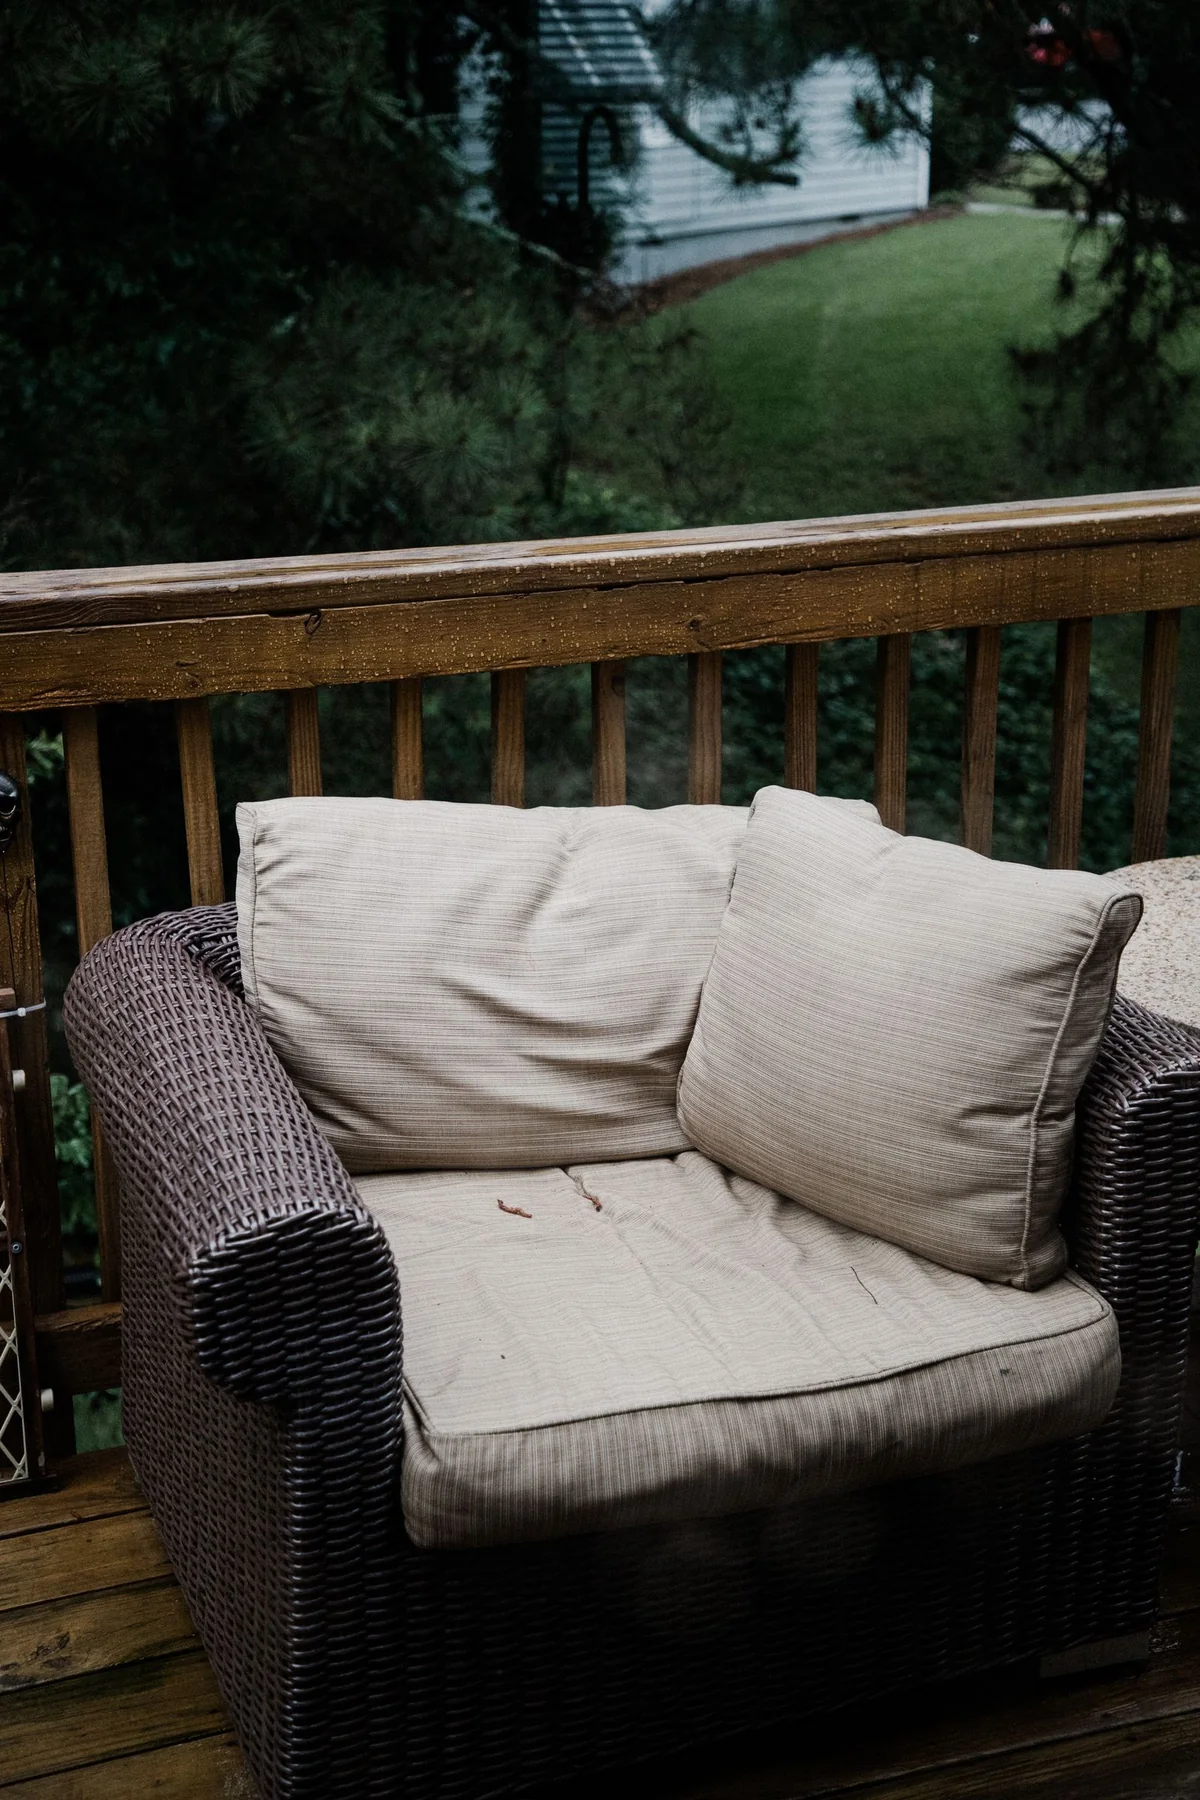
A woven outdoor armchair with loose cream cushions beside a timber railing.

The sofa is comfortable; carrying its cushions through the house twice a day may be less appealing. Before buying, gather the full set of loose pieces and imagine putting them away. The storage place and the route to it are part of the seating decision.

Rehearse the end of the evening

Use the actual cushions or their measured dimensions to test the storage opening, not only the advertised internal volume. Try the trip from seating to storage with the amount one person can comfortably carry. A theoretically adequate box can still make the routine awkward.

Check the complete cushion guidance, including filling and cover. A well-known fabric name does not establish the drying or storage requirements of the entire product.

Count trips rather than theoretical volume

Measure the actual cushions, then test how many one person can comfortably carry and whether they pass through the storage opening. Include the walk back for the next load. A cabinet with enough volume can still produce a routine the household avoids.

Check the maker's drying and storage guidance before treating the box as an immediate destination for damp cushions. If the routine is too demanding, compare a smaller cushioned group, a more convenient store, or seating with fewer loose pieces. Keep comfort in the comparison; the goal is furniture whose enjoyable use and everyday care are both realistic.

Compare seating by the care it asks of you

ArrangementRoutine to test
Fully cushioned loungeNumber of pieces, drying needs, and storage trips
Smaller cushioned groupWhether it provides the comfort used most often
Alternative seatingWhether less setup still meets comfort needs
Covered furnitureThe exact maker's guidance for covers and ventilation

The right choice depends on how central the lounge is to daily life and whether its routine is realistic for the household.

Backyards Magazine / Fall EditionGrow
Grow

A garden for what comes next.

Look at what remains after flowering, get to know the soil, and make a thoughtful start on next spring.

Grow / The Garden Notebook

The garden after the flowers

Faded flowers, upright stems, and the shapes that carry a garden into its next season.

A hand reaches toward dried flower heads on upright stems, with leafy shrubs and orange fruit behind.

The last flowers are only one ending in a garden. Once the petals have gone, the shape of a shrub, the outline of a seed head, and the color of a stem become easier to see. A border that seemed to be all blossom in July may turn out to have a second, less conspicuous season.

This is a useful moment to pause before clearing everything away. Look from the kitchen, walk the main path, and sit where the afternoon light reaches. Notice which plants still make a recognizable shape. Some will have collapsed; others may be holding the view together more clearly than they did in summer.

Look for a silhouette

Three qualities are worth separating: outline, texture, and background. An upright stem can be legible from across the lawn. A fine seed head may only become visible against a dark hedge. A broad, papery flower head can catch the light even when its color has faded. The interesting plant and the useful position are part of the same decision.

Try a simple photographic study before moving anything. Take one photograph facing the border, then another from the chair or window you actually use. A plant that looks handsome at arm's length may disappear in the larger view. Conversely, a modest group beside a dark fence can have more presence than a much larger planting against pale sky.

Leave the photographs unedited. They are a record of this garden under this light, including the bin, the drainpipe, and the bare corner that may be drawing more attention than the planting. Those ordinary details help explain why a composition feels unfinished.

Know what you are leaving

Hydrangeas make the distinction between appearance and care particularly clear. University of Minnesota Extension notes that dried panicle-hydrangea flowers can provide winter interest. Its pruning guidance also distinguishes hydrangea species because their flowering habits differ. Keeping an attractive head for a while and deciding when to prune the shrub are related questions, but they are not interchangeable instructions. Identify the plant before cutting.

Grasses offer a different outline. Minnesota's plant database describes 'Karl Foerster' feather reed grass as upright and clump forming, with gold seed heads and winter interest. That is a specific example to investigate, rather than a prescription for every region. Ask about suitability, mature size, local invasive-plant guidance, and performance in your own soil and exposure before choosing a grass for its winter picture.

There is no need to rebuild the whole border around one season. If the garden already contains a plant that remains handsome, repeat its visual role elsewhere: another upright shape, a denser background, or a low evergreen near a path. The answer may be moving the viewpoint or editing the foreground rather than buying the same plant again.

Let care follow the place

The decision to retain stems must fit the site. A dry inland garden beside a house in wildfire country has different priorities from a damp border well away from a building. Follow local defensible-space guidance where it applies. Keep walking surfaces clear, and seek plant-specific advice for diseased material rather than retaining it for appearance.

In a snowy climate, some of the composition will disappear beneath snow or flatten under its weight. In a mild climate, the change may be from flowers to foliage with little period of bare ground. Study the season you actually have. A photograph of a frosted garden elsewhere is a way to notice form, not a calendar for your own work.

Make one adjustment for next year

Choose the weakest view and one change that could improve it. A dark background might let pale stems read more clearly. A lower plant beside the path might preserve a view of the taller group. A seat turned slightly could bring an existing shrub into the scene.

Keep a second photograph after the first substantial weather change. The comparison tells you whether you were admiring a brief moment or a useful part of the garden's longer life. Both have a place. The pleasure is learning to recognize them before the shears come out.

Grow / The Garden Notebook

Build the border around leaves

Shape, scale, and repetition can carry a garden between flowering moments.

Overlapping green hosta leaves with pale variegated edges.

After the flowers fade, the leaves are still beside the path. Their size, shape, and repetition determine whether the border holds together between blooms. Compare those qualities when choosing plants, with as much attention as you give the flowering photograph on the label.

Read the border in silhouette

Temporarily ignore flower color and describe the proposed plants as broad, fine, upright, rounded, or spreading. A border with several different species can still look repetitive if their silhouettes are similar. Conversely, a small palette can feel varied when its forms are distinct.

Use photographs or simple cutout shapes to compare the arrangement at the distance it will normally be seen. Fine leaf detail may disappear from an upstairs window while a clear mass remains legible.

Make the comparison without the flower photograph

Cover the flower portion of a reference image and describe what remains. If every plant becomes a similar mound, the proposed variety may depend mainly on bloom color. Compare a version with a repeated background and one contrasting form at the place where the path turns or a chair pauses.

Use the plants' expected mature outlines, with suitable local choices confirmed before ordering. A fine texture beside a seat can reward close viewing while disappearing at the far end of the yard. Place the detail where it will actually be noticed and reserve the distant view for stronger masses.

Place contrast where someone pauses

A strong texture change beside a seat or at a path turn is likely to be noticed. Repeating the same high contrast at every point can make the whole bed restless. Let a quieter dominant texture connect the moments of emphasis.

Viewing positionDesign emphasis to consider
Beside a chairLeaf detail, close texture, and comfortable mature spread
Across a terraceDistinct masses and a clear edge
From an indoor windowSilhouette and relationships between larger groups

Ask what the foliage looks like before and after the flowers. A convincing border should have an arrangement to return to when its seasonal accents pass, rather than rely on everything blooming at once.

Grow / The Garden Notebook

What a soil test can tell you

Choose the right test, keep distinct beds separate, and turn a laboratory report into a considered planting decision.

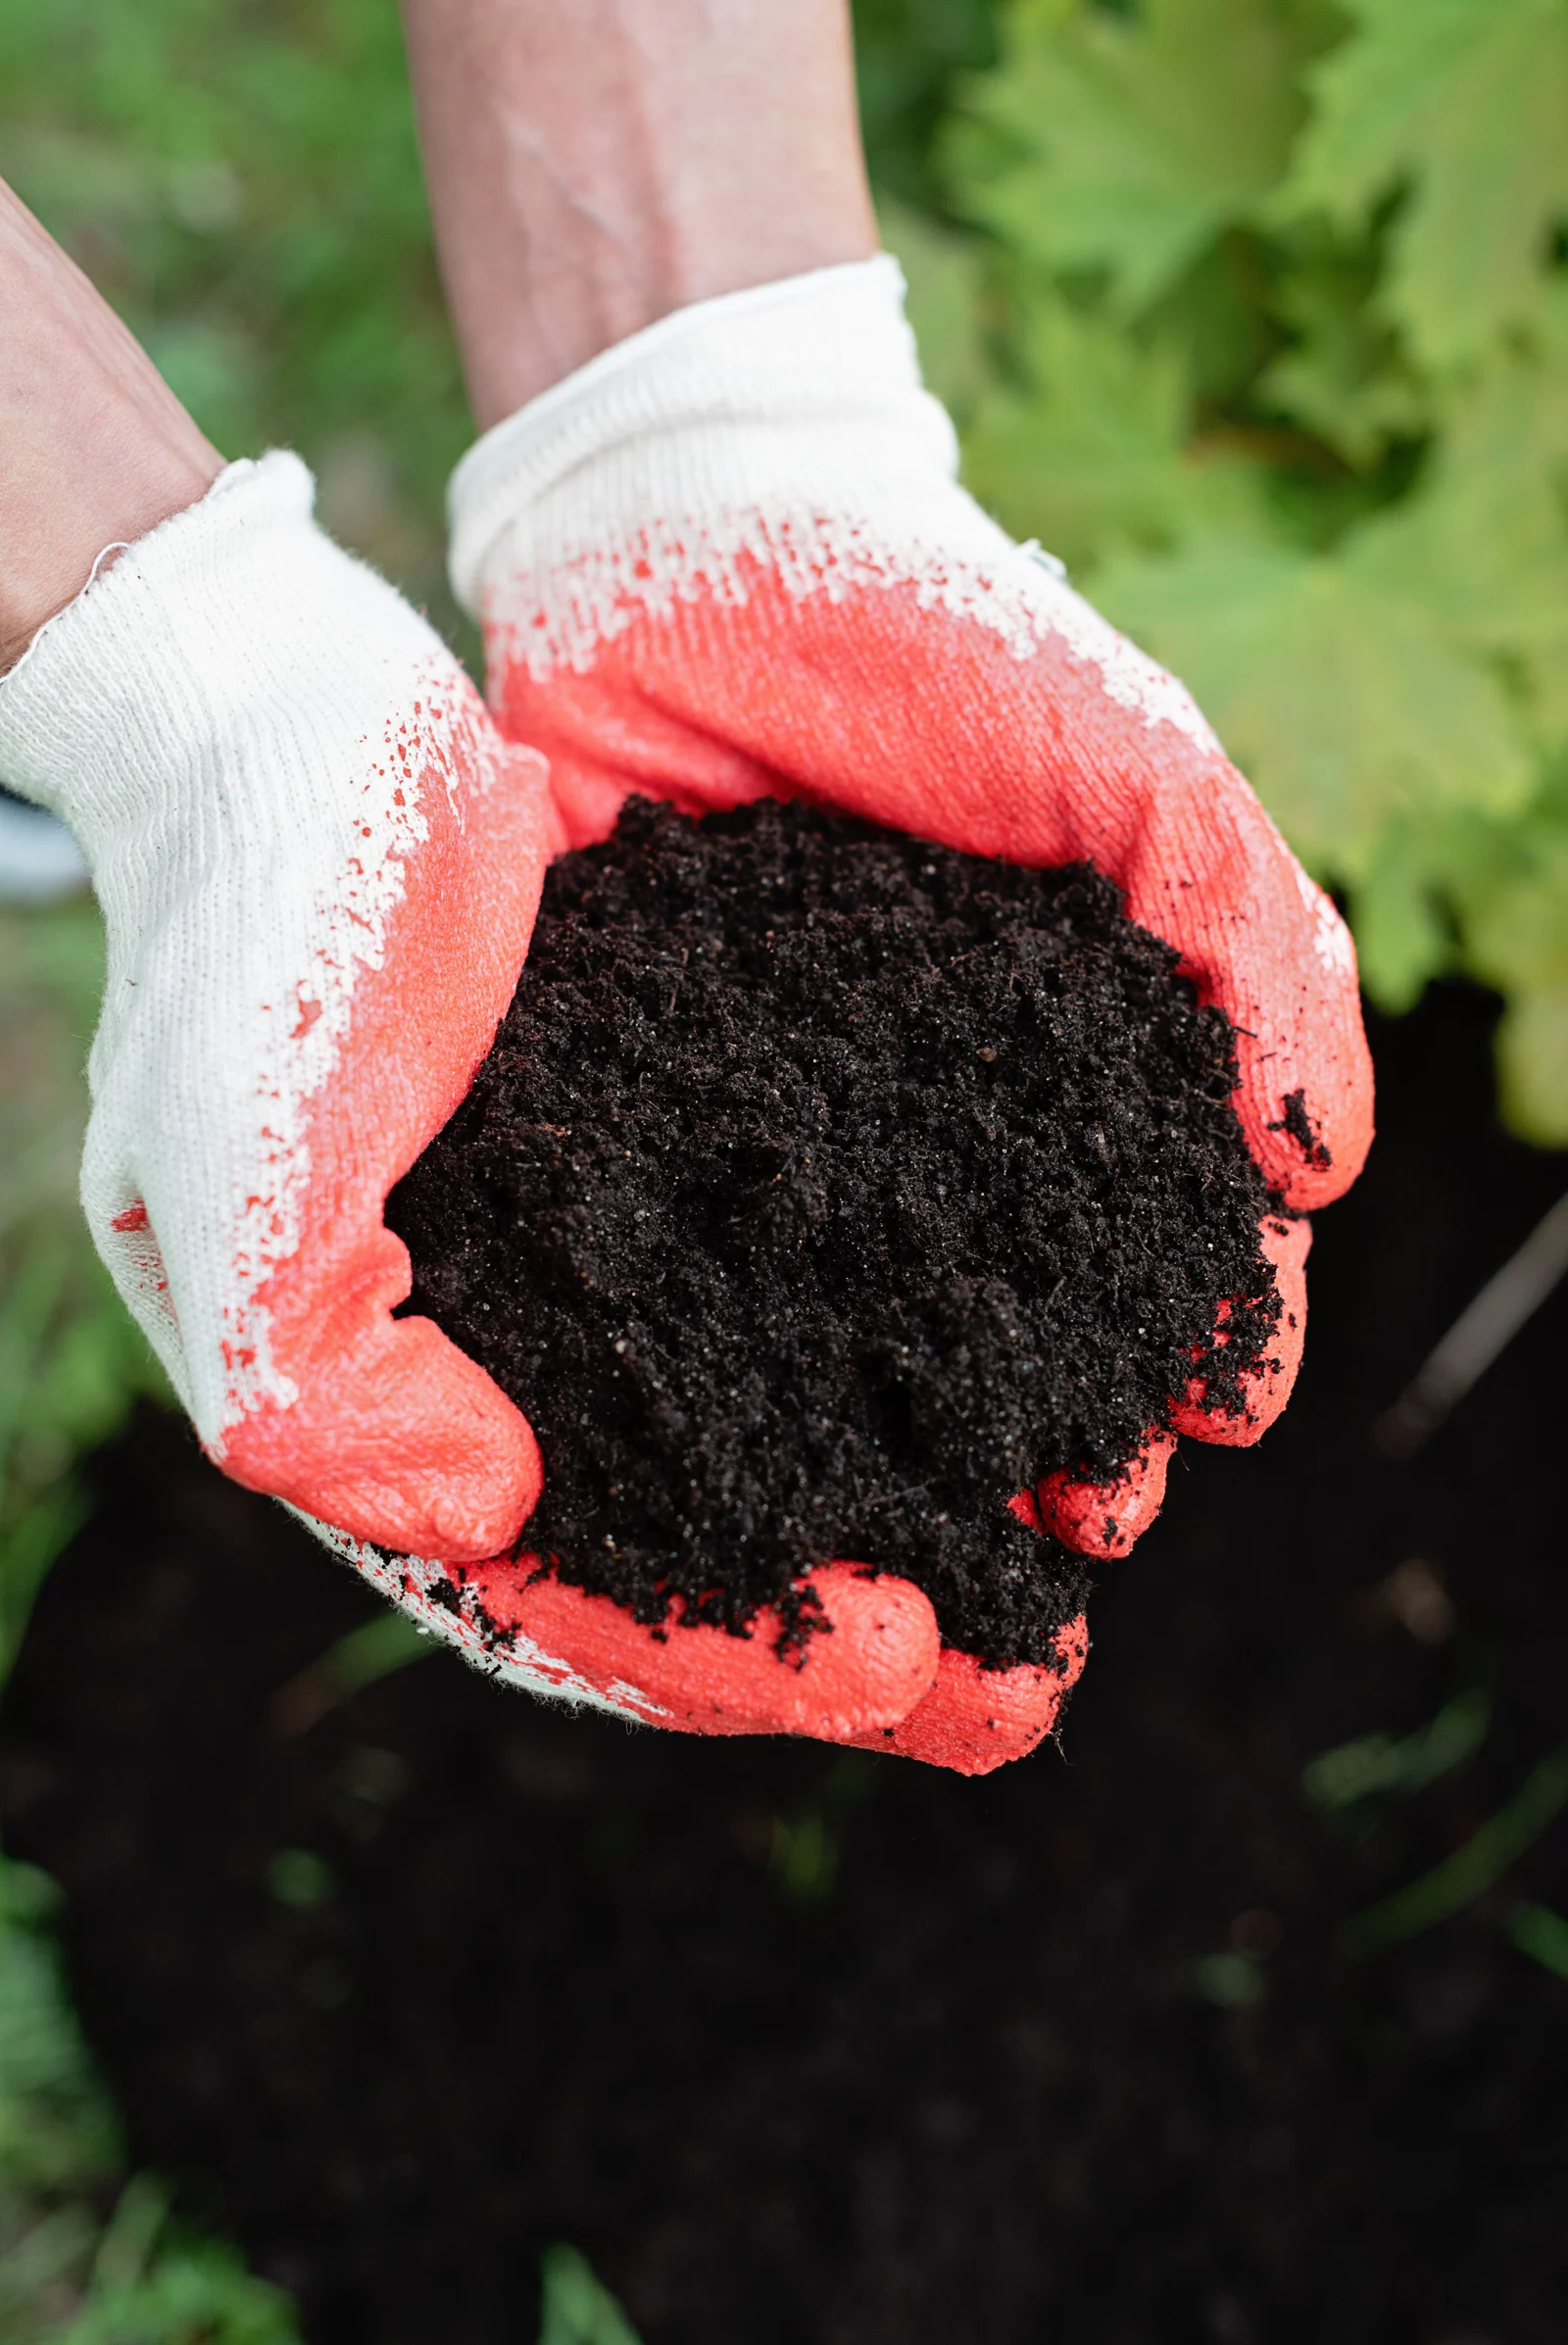
Red-and-white gardening gloves hold a handful of dark soil above a garden bed.

A bag of compost can feel like progress. So can a cart full of plants. But neither answers the question beneath the border: what does this particular soil need? A useful soil test turns a vague instruction to “improve the ground” into a more specific planting conversation.

The test also has limits. A fertility report does not explain every drainage problem, certify a site as uncontaminated, or identify all the reasons a plant is failing. Choose the test to answer a question, then keep its result attached to the place it came from.

Decide what you are testing

Begin with a simple map. Give each distinct growing area a name: front lawn, new vegetable bed, established shrub border, or recently filled corner. Record the intended planting and anything you know about the soil’s history. Imported fill, former paving, repeated fertilizer use, and an area that stays wet are useful context for the lab or local Extension office.

University of Maryland Extension recommends following the selected laboratory’s sampling instructions and keeping distinct areas separate. A basic panel commonly covers pH and several nutrients, but the exact tests vary. Some labs include organic matter or lead; others do not. Confirm the panel before paying for it.

An average made from unlike places can obscure the decision. If the lawn and a recently filled bed need different treatment, combining their samples gives neither area a clear starting point. Name the sample on the submission form exactly as it appears on your map.

Ask the lab before taking the sample

Use a laboratory serving your region and tell it what you intend to grow. Obtain its instructions for sampling depth, number of subsamples, handling, and shipping. Do not substitute a sampling depth copied from an unrelated crop guide. Arrange utility locating before putting tools into the ground and follow the applicable digging instructions.

If the site has a history that raises contamination concerns, explain that history before sampling. A routine garden panel may not test for the substance of concern. Ask the appropriate local environmental or public-health office and the lab what assessment is needed, particularly for a proposed food garden. “The soil test looked fine” is meaningful only when you know what it tested.

Read the recommendation as carefully as the number

The most useful report connects a result with your intended planting. Keep the lab’s interpretation with the figures; a number copied into a notebook without its units or method may be difficult to interpret later.

Part of the reportWhat to clarify before acting
Sample identityDoes it match the correct bed and intended planting?
pHWhat range is appropriate for those plants, and is any adjustment recommended?
Nutrient recommendationIs the rate expressed as product weight or actual nutrient weight?
Area and unitsIs the instruction per square foot, per 100 square feet, or per 1,000?
TimingIs the recommendation a single application, a split application, or a later retest?

Do not round a recommendation up to an entire bag because that is what the store sells. Conversely, do not assume that a visibly dark soil needs no further interpretation. Appearance is useful for describing a site; it is not a measurement of pH or nutrient availability.

Check the arithmetic before opening a bag

Here is a calculation example, not a treatment recommendation. Suppose a laboratory instructs you to apply 4 pounds of a specified product per 1,000 square feet, and the relevant bed measures 250 square feet. The area fraction is 250 ÷ 1,000, or 0.25. The corresponding quantity is 4 × 0.25 = 1 pound of that specified product.

That calculation is not interchangeable with an instruction for 4 pounds of actual nutrient. A product’s concentration changes the amount required. If the units or product match are unclear, ask the lab to interpret them before applying anything. Keep its written answer with the report.

Keep physical conditions in the discussion

If water remains in the bed or roots encounter compacted fill, ask for a separate assessment of the physical soil conditions and drainage. A chemical fertility report is not a specification for repairing those problems. Likewise, a recommendation to add an amendment should identify the material, amount, area, and method rather than becoming a general instruction to add more everywhere.

File the original report with the sampling map, application record, and planting plan. Record what was actually applied, not just what was purchased. When you revisit the bed, you will have a useful history instead of a succession of guesses.

Grow / The Garden Notebook

Start a native garden with one well-chosen patch

Make the first planting specific to your region, your site, and the time you can give it.

Purple coneflowers flowering in a planted garden border.

One bed is enough to begin learning a native planting. Its sun, moisture, and soil give the selection a specific starting point; the way you tend it will teach you what to try next. Begin with plants appropriate to your region and those conditions, rather than a generic list of favorites.

Make the first patch a learning project

Choose an area you can observe frequently and care for consistently. Record its conditions before shopping, then take that information to a local specialist. University of Minnesota Extension's native-plant resources are a regional starting point; use guidance appropriate to your own state and site for the actual selection.

A limited palette makes the first season easier to understand. Repetition lets you see whether a plant's behavior is typical or whether one position differs. Keep exact plant names so later questions and replacements do not depend on a vague description of a flower.

Ask what native means for this place

Use the plant's exact name and ask whether it is native to the region and suited to the particular patch. Regional origin and site suitability are different questions. A plant associated with a wet habitat is not automatically an answer for a dry exposed bed merely because both are in the same state.

Start the shopping list with the conditions already recorded: light, moisture, soil, and available mature space. Use local extension or native-plant resources to narrow the choices. Then select the forms and seasonal roles that make the bed legible from the house. The ecological intention and the composition can guide the same decision.

Plan for more than flowers

Ask about growth habit, mature size, seasonal appearance, and the wildlife relationships of the exact species. Native plants can provide food and habitat, but suitability still depends on the site. Discuss the establishment and ongoing care of the proposed planting with someone familiar with local conditions. “Native” is not a promise that a newly installed bed can be ignored.

Record more than survival

ObservationWhy it helps the next decision
Seasonal appearanceShows when the composition has structure or gaps
Mature direction of growthReveals future conflicts with paths or neighboring plants
Care requiredTests whether the planting fits the household routine
Use by wildlifeAdds an observed dimension beyond flower color

Expand from what you learn

Photograph the patch from the same location and keep short notes. A second bed can repeat a successful structure while responding to different light or soil elsewhere in the yard. Avoid treating the first success as proof that the same plants suit every corner.

Grow / The Garden Notebook

Mulch, with room to breathe

Inspect the layer you have before adding another. Depth, exposed root flares, and a measured order matter more than a freshly covered bed.

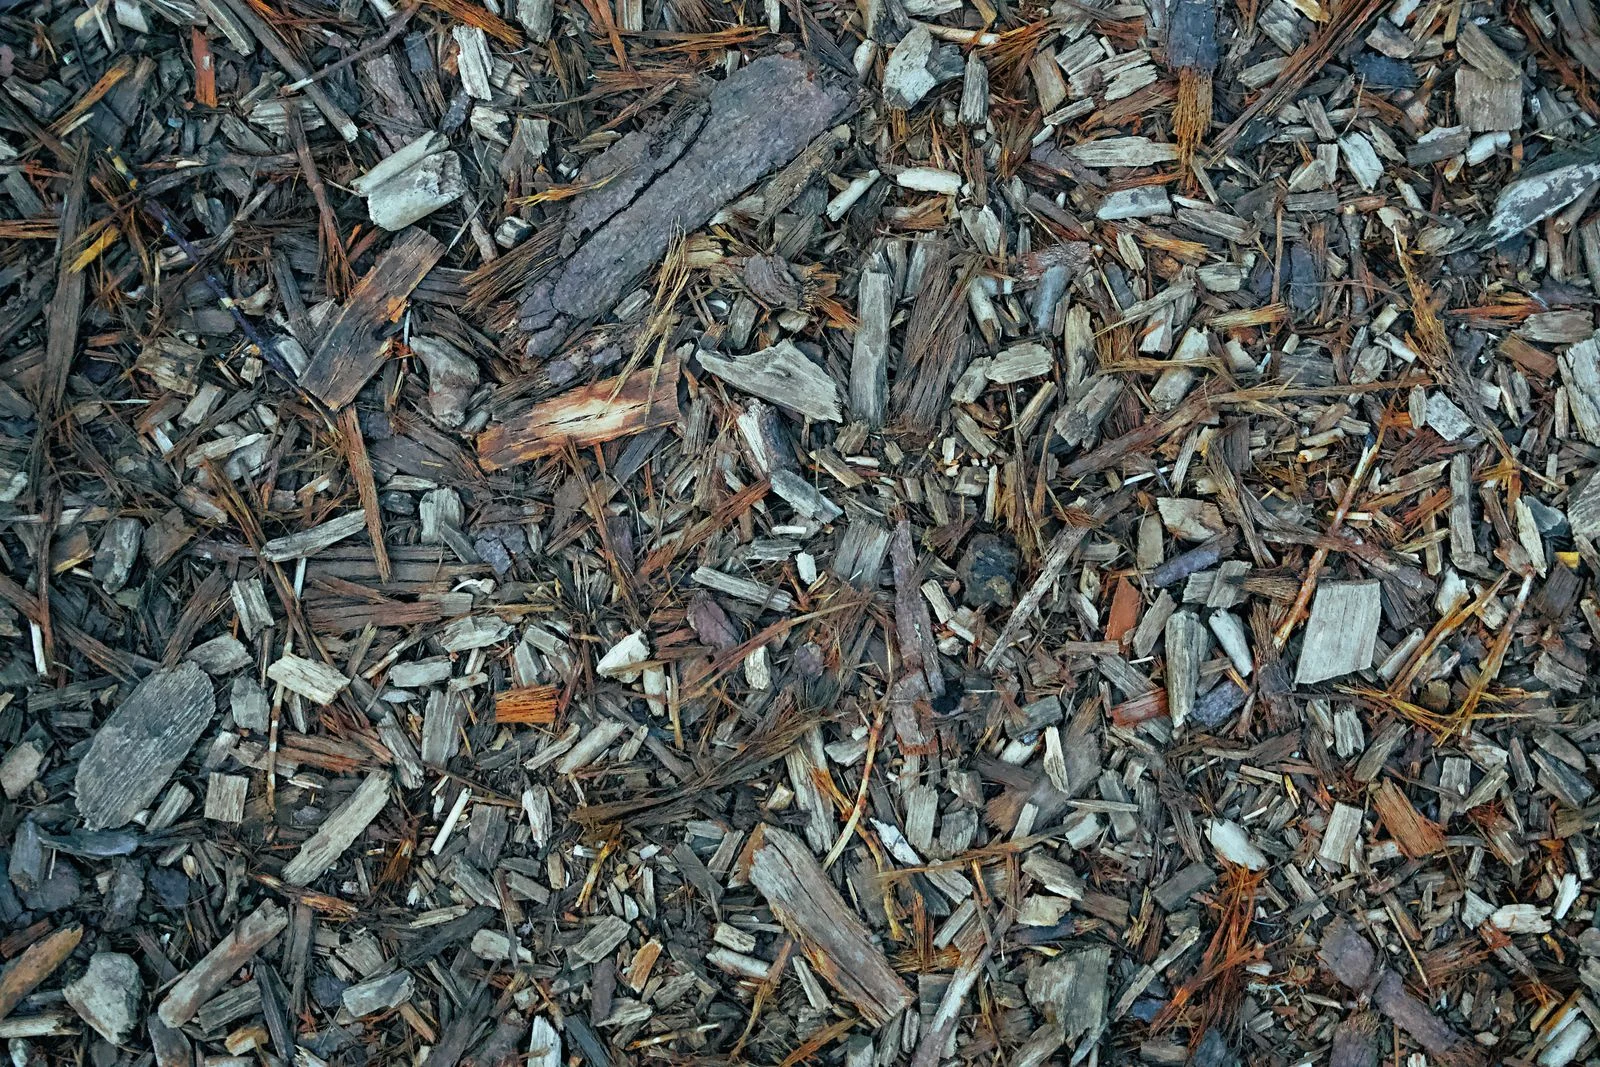
An uneven mixture of brown wood chips and small woody pieces covers the ground.

A fresh layer of mulch can make a bed look finished in an afternoon. The roots below it are less interested in the color than in depth, moisture, and air. Before ordering another delivery, part the existing covering and find out how much is already there.

That small inspection changes the job. Some beds need replenishing; others need leveling, weeding, or material pulled away from stems. An annual delivery is not evidence that the garden needs another full layer.

Decide which surface you are making

Mulch sits on the soil surface. Its purpose may include suppressing weeds, conserving moisture, or protecting an area around a tree from mowing equipment. A soil amendment is used differently. Do not assume that every material suitable on top of a bed should be dug into it.

University of Maryland Extension permits fresh arborist wood chips as surface mulch around trees and shrubs, while distinguishing them from material incorporated into the soil. Its guidance also gives different depths for different materials. Select for the planting and site, not only for a color that looks attractive in the bag.

For a productive bed, ask about the crop and its cultivation cycle. For a permanent shrub border, consider longevity and how the surface will be maintained. In a designed habitat patch, some undisturbed bare ground may have a purpose. One treatment need not cover every square foot of the property.

Measure the total depth

Maryland recommends a shallow layer, generally one to three inches for trees and shrubs, with mulch kept away from bark. University of Minnesota's newly planted tree guidance specifies a three-inch layer and an exposed root flare. These are plant-care references, not instructions to add three inches on top of whatever remains.

Take several measurements after moving loose leaves aside. Check beside the path, in the center of the bed, and near trees where repeated spreading may have formed a mound. Keep the place where the trunk widens into roots visible. Do not pile mulch against the trunk to create a cone.

If soil, rather than loose mulch, buries the flare or you find substantial circling roots, ask an arborist to assess the tree. Aggressive digging around roots is a different task from gently moving a surface covering.

Order the missing amount

Measure the area that actually needs coverage, excluding paving and deliberate gaps. Then calculate the additional depth needed to reach the chosen total. Break an irregular bed into approximate rectangles rather than treating the whole yard as one rectangle.

Ask how the supplier measures the material and whether an allowance is needed. Bag sizes and bulk units should be compared in the same unit. A little arithmetic can prevent a leftover mound becoming an excuse to overfill the beds.

Keep edges, water, and maintenance visible

Work around plant crowns and trunks rather than burying them. Keep drainage inlets and access covers visible, and prevent loose material from spilling onto walking surfaces. A neat raised edge should not turn the bed into a place where water collects against a building.

After watering or rain, check the soil beneath the mulch. A damp-looking surface does not prove that water reached the roots. Minnesota's tree guidance warns that excessive depth can interfere with water movement and oxygen around roots; a thicker layer is not automatically better protection.

In wildfire-prone areas, the material and location must follow local defensible-space requirements. An organic mulch appropriate farther into a garden may be inappropriate beside the house. Use the property's fire guidance before applying a general horticultural recommendation there.

Record the material, approximate total depth, and date. Next time, part the layer before ordering more. Some areas may need a top-up while others need only their edges tidied and mulch eased away from stems.

Grow / The Garden Notebook

Plant a small spring in a pot

Choose the flowers, settle their winter care, and leave room for what happens after bloom.

Small terracotta pots of yellow daffodils stand among moss and birch logs in an indoor display.

Planting a pot of bulbs in fall is a small act of anticipation. For months, the most visible part of the arrangement may be a label. The flowers arrive later, when a doorstep or terrace is ready for something fresh to look at.

The appealing photograph is only one part of the project. A useful plan also includes the months of rooting and cold, the weight of the filled pot, and somewhere for the leaves to finish their work after flowering. Resolve those questions before ordering a collection of bulbs.

Choose the display you want

Start with one kind of bulb and one position where you will see it often. Compare the expected height and flowering period of specific varieties. A low display beside a bench asks for different proportions from a pot viewed across the yard. Several pots of one variety can make a clear composition without the uncertainty of trying to synchronize several kinds in one container.

Illinois Extension describes containers as a useful way to display spring bulbs and then move them aside while their foliage matures. That second position is part of the design. It needs to support the plant's continuing care, not simply hide it in a dark shed.

Use the planting depth and spacing recommended for the particular bulb and container method. Measure the pot's usable interior, including room beneath the bulbs and watering space at the top. The height printed on the outside of a decorative container may include a false bottom or a narrow section with little growing space.

Separate outdoor planting from forcing

Spring-flowering bulbs and their chilling requirements vary. Growing them outdoors on a local seasonal schedule is different from forcing a pot into early bloom indoors. Decide which project you are undertaking, then follow guidance for that method.

Iowa State's forcing instructions describe a controlled cold period for potted tulips, hyacinths, and other spring bulbs, followed by a staged move into warmer conditions. Those instructions illustrate why a warm living room is not a substitute for winter. They are not a universal schedule for every species or an instruction to leave every pot outside.

In a cold-winter region, ask your local extension service or bulb supplier how to protect a container from damaging freezes while meeting the bulbs' requirements. In a warm-winter region, ask whether the selected variety needs prechilling and how that is supplied. A USDA hardiness-zone label for a bulb in the ground does not answer every question about an exposed pot.

Give the pot a winter address

Choose the overwintering place before filling the container. It must suit the bulb, the pot, and the climate. An unheated garage can fluctuate; a sheltered wall can collect rainfall; a decorative outer container can hold water around an inner pot. Describe the actual conditions when asking for local advice.

Use a container with a working drainage arrangement and a suitable growing medium. Follow the container maker's winter instructions. Keep a label that records the variety, planting date, depth used, and intended winter position. If you plant several pots, a second copy of the record indoors prevents a lost label from becoming a mystery in spring.

Before buyingSettle this question
BulbWhich variety suits the chosen growing method and local winter?
ContainerIs there enough usable depth, drainage, and winter durability?
Winter positionHow will temperature and moisture be monitored?
DisplayCan the filled pot be moved safely to its flowering position?
After bloomWhere can the leaves mature, and what happens to the bulbs afterward?

Enjoy the flowers without losing the next stage

Move the display when conditions and plant development suit it, following the guidance for your method. Check moisture rather than treating a pot as a once-planted decoration. A cover or outer vessel should never conceal an accumulating pool of water.

When the flowers finish, let the foliage mature according to the bulb's needs. Whether the bulbs can be planted out or are best treated as a one-season display depends on the species and the way they were grown; confirm that before assuming they will repeat the performance.

Photograph the flowers and keep the label. Add a note about where the pot spent winter and whether you would use the same container again. Next fall, that small record will be more helpful than trying to remember which bulbs were in the favorite pot.

The back of the book

Credits

Cover: Photo: Marta Wave · Chapter photographs: Photo: meomupmofilm; Photo: Michael & Diane Weidner; Photo: Aaron Burden

Backyards Magazine · Fall Edition. Editorial: Clara Bennett, the publication’s editorial pen name. Editorial contact.

Until the next season

Keep a little of it.

One place to sit. One detail to study. One change that makes the garden easier to enjoy. Take a thought from these pages back into your own outdoor room.

Your saved ideas ↗Keep the Fall Edition / PDF ↓Back to the cover ↑